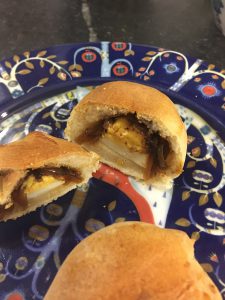
Mackerel (or Ground Beef, or Vegetable) Cutlets
(90 minutes, makes about 50)
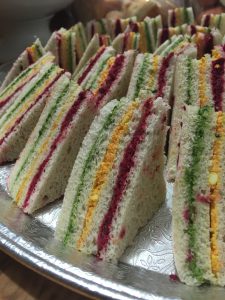
There’s a part of my mind (formed in childhood over monthly Sri Lankan birthday parties at various aunties’ homes) that says a party isn’t properly a party unless there are rolls and cutlets. So when people agree to come over to my house and let me feed them rolls and cutlets, it makes that childhood bit of me very happy.
Some Americans find these too fishy, but I love them. Over the years, my family has come up with adaptations to suit the tastes of those (like Kevin) who dislike fish, and they’ve even come up with a variation for vegetarians. But honestly, the mackerel ones are the tastiest.
I wouldn’t recommend attempting this recipe unless you’re willing to get your hands dirty (and fishy-smelling)—you really need to work the filling with your hand to blend and shape it properly.
2 cans of mackerel, 15 oz each
2 large russet potato
4 medium onions, chopped fine, for sautéing
1 tsp black mustard seed
1 tsp cumin seed
2 TBL oil or ghee
1 rounded tsp salt
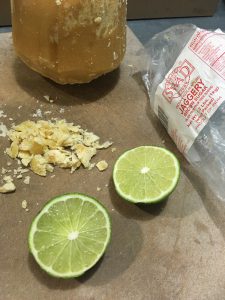
2/3 cup lime juice
2 small onions, minced, for mixing in
4 rounded tsp finely chopped fresh Thai green chilies
1 rounded tsp ground black pepper
2 egg, beaten
dry breadcrumbs, for coating
oil for deep frying
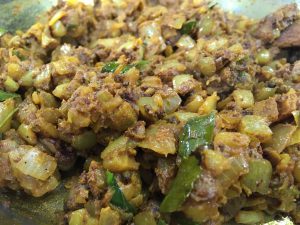
- Drain fish thoroughly, removing as much liquid as possible. While fish are draining, boil the potatoes, peel, and mash them. Clean the fish, removing scales and bones, and break it into small pieces.
- Sauté the four fine-chopped medium onions in oil with cumin and black mustard seed until golden-translucent. Add fish, salt and lime juice, then cook until very dry (this process reduces the fishy smell, and the drier you get the mixture, the less excess oil they’ll pick up when frying). Let cool.
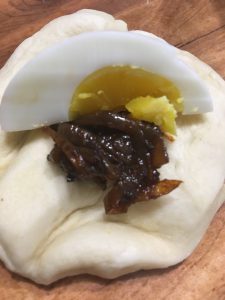
- Using your clean hand, mix thoroughly the fish, mashed potatoes, the two small minced raw onions, black pepper, and chilies until a fairly smooth paste. Shape the mixture into small balls, about the size of a cupped palm. I squeeze the mixture in my balled hand as I go, compressing so the resulting ball is nice and firm—that helps it keep its form when frying. (You can pause, cover with plastic wrap, and refrigerate at this point if making a day or two ahead.)
- Roll each ball in beaten egg, and then roll each ball in the dry breadcrumbs. (You can freeze at this point if making ahead—spread them out on a flat cookie sheet so they’re not touching and freeze them—once frozen, you can pack them more tightly in gallon ziploc bags, and they should hold their shape. They’ll be fine in the freezer for weeks, which helps when you’re prepping for a big party; you can either fry them frozen or spread them out on plates and let them thaw first.)
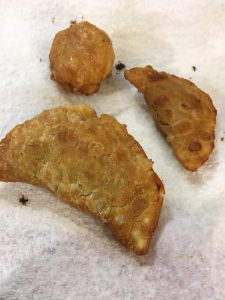
- Fry a few at a time in deep hot oil over medium-high heat—not too hot, or they’ll start to break apart! This should take a minute or so each. When well-browned, lift out with a slotted spoon and drain on a metal rack placed over a tray lined with a few layers of paper towels.
For ground beef cutlets: For 2 lb lean ground beef, when you sauté the 4 chopped onions, add 1-2 heaping tsp red Indian chili powder and 1/2 cup ketchup, as well as the 1/2 rounded tsp salt from above. Add the ground beef (skipping the lime juice), and fry until very dry, draining any excess oil. Skip the raw onion, chilies and black pepper—proceed otherwise as for the fish cutlets.
For vegetable cutlets: Just use 1 lb frozen mixed vegetables, thawed (you might have to cut up the green beans into smaller pieces). Sauté the onions, mustard seed, and cumin seed as for the fish; add the vegetables and salt and cook until very dry. Skip the raw onion if you like, but definitely stir in an extra 1/2 tsp of salt when you mix the veggies in with the potatoes, black pepper and chilies. Proceed otherwise as for the fish cutlets.


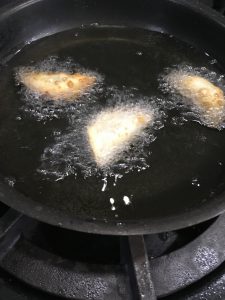


 I ran out of canola oil while setting up to deep-fry these; luckily Kat (who lives across the way) had some coconut oil she could send over with a child. So I fried in a combo of the two, which I think was perhaps perfect — the canola gave the characteristic crispiness, and the coconut gave some extra richness. I hadn’t fried in coconut oil before, though, and was really surprised when I put the first patty in — it foamed up dramatically (which may have had something to do with combining the two oils — I’m not sure)! I called Kevin over to make sure I wasn’t doing something wrong. But all was very well, and they were soon devoured. (Pictured below is a double-batch, filling three plates.)