 Somehow I got it into my head that I had time to make both gummy bears and cake with Kavi and her friend Emma after school, before I had to get ready and go to a dinner. That was a lie. Gummy bears take hours to set, it turns out, so I didn’t even attempt them, which was good. Another day. I managed the cake, but in a slightly frantic manner, and I got some things wrong. Oops.
For one, I hadn’t taken the butter out to soften in advance, and when I tried softening it in the microwave (which you *can* do if you are very very careful), I melted it too much, so I basically had oil. Now, you can make a cake with oil, but that makes more dense, less fluffy. That was fine for the bundt pan I ended up using, as it turned out!
I also hadn’t looked at the recipe in advance, which was one that was supposedly for Sri Lankan birthday ribbon cake — it’s no one’s birthday, but I’d promised to make a cake with Kavi and this seemed like a good one to learn to do, because my mother’s homemade birthday cakes from childhood were delicious. I was tempted to try to make Swedish princess cake (GBBO is a bad influence), but I sternly told myself not to be ridiculous. (Another day. Shh…)

Looking at the Sri Lankan recipe, it mostly seemed like a pretty standard yellow cake recipe, except that some versions called for ‘thick milk’ and frantic googling turned up various options, such as ‘curdled,’ which seemed very wrong, or ‘clotted,’ which was possible but unlikely. It also might have been evaporated milk or condensed milk, both of which are used in Sri Lankan dessert-making a lot, but there’s a big difference between them! And if I hadn’t been in a hurry, I could have just checked with my aunties, but I didn’t have time. So oh well, I used the recipe that skipped that element — in fact, it skipped milk entirely — but now I’m wondering whether it would have been better with. (Not condensed milk, I think, because it’d be much too sweet unless you also reduced the sugar.)

The finished cake ended up tasting pretty much like a classic yellow cake, I think. (1 c. butter (except actually oil), 1 c. sugar, 4 eggs, 2 c. flour). Traditionally, you’d divide the batter, color it pink and green (why pink and green? I don’t know!), pour it into two separate 8 or 9 inch cake tins, bake, and then assemble with white buttercream frosting between and on top, decorating as desired. Happy birthday! (If you google ‘Sri Lankan ribbon cake,’ lots of examples will pop up.)
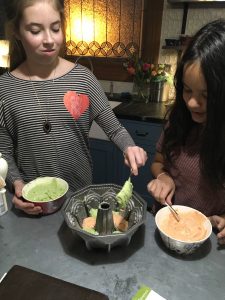
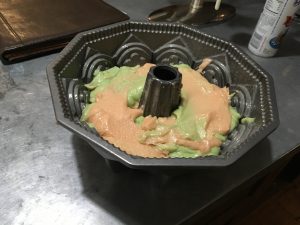
But I didn’t particularly want to make frosting — honestly, this cake doesn’t need it. The kids have been totally happy just devouring slices as is. And I had a new bundt pan that I was dying to try. So I figured what the heck, let’s do it marbled instead, and just dust it with powdered sugar.
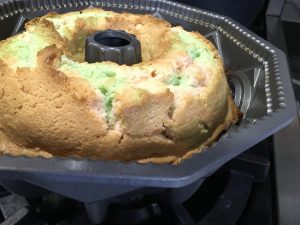
(The powdered sugar is a lie in that first photo, because I had to run out the door, so I dusted it and took the photo when the cake was just out of the oven, so of course, it took 2 seconds before the sugar was all absorbed and disappeared. Cool cake first! But it does look pretty, doesn’t it?)
Came out great, and the kids had fun with the slicing reveal! Anand was disappointed that there was no chocolate, so the next time we do a marbled cake, I’ve promised that we’ll do one that’s half chocolate. (What I really want to do is half chocolate, half mango-passionfruit, but I’m not sure he’ll go for that. We’ll see.)
This is a yummy cake, but I admit, I kind of want to do it again, in traditional layered style instead, and actually use thick milk — if someone Sri Lankan can tell me what that is, please?
I’m thinking a ribbon cake in pink, green, and yellow will be perfect for Easter, and for that one, we can slather on the buttercream frosting and decorate the heck out of it too. Putting it in the calendar so I don’t forget!
*****
1 c. butter (room temperature)
1 c. sugar
4 eggs
2 t. vanilla
2 c. flour
1/2 t. baking powder
1 t. salt
1. Preheat oven to 350F. Beat butter and sugar until soft and creamy; add eggs one by one. Add vanilla and mix well.
2. Sift flour with baking powder and salt. Add flour gradually and mix well.
3. Divide the mixture into two portions and color lightly in pink and green.
4. Grease and flour a bundt pan (Baker’s Joy spray makes this easy). Spoon the colors in (or as we said yesterday, ‘glop’ them in), alternating. (If you like, you can take a toothpick, fork, or skewer and swirl for more of a ribboned effect.)
5. Bake for 35-40 minutes until toothpick comes out dry. Let cool 5-10 minutes, turn out onto a wire rack, let cool completely, dust with powdered sugar, and serve. Lovely with tea.

 (1 hour, serves 6-8)
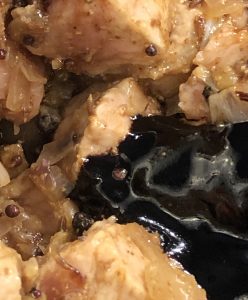


 Instant Pot Sri Lankan Beef Smoore
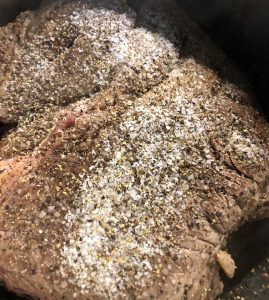
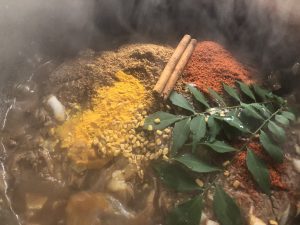
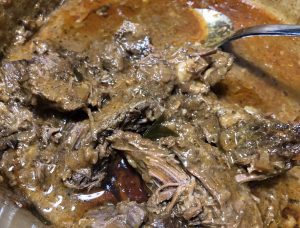
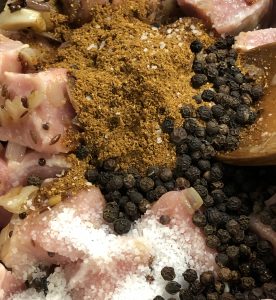
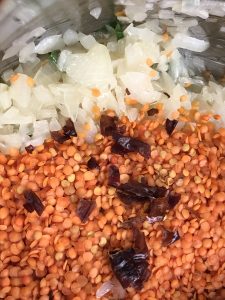
 Okay, so this was my first instant pot experiment, and I definitely went wrong in a few ways. For one, red lentils are delicate and don’t actually take that long to cook, so it doesn’t really make sense to make them in a pressure cooker — the stovetop works fine. All the lentil recipes I looked at warned against red lentils for the pressure cooker!
 It’s going to take me a while to figure out what the Instant Pot is actually good for. For example, this chicken and potato curry isn’t really any faster doing it this way than on the stovetop — you need the same time sautéing, then the time for preheating and pressure cooking, then you need to remove the chicken and potatoes and cook down the sauce, ideally.


 We eat a lot of bananas in this house, but sometimes we don’t get to them before they start going bad, so we toss them in the freezer and every month or so, I pull them out and make banana bread. I am here to tell you that pork vindaloo is EXCELLENT on banana bread — it is so good that if I ever open a cafe, I would totally serve this, and people would go wild. I suppose it’s not so surprising that pork + bananas is yummy, but this specific combo surprised me. Experimenting yields great rewards sometimes!
 Happy Pongal! Pongal is a four-day-long harvest festival celebrated in Tamil Nadu and Sri Lanka (this year it’s Tues Jan 15 – Fri Jan 18) — when crops like rice are harvested. Yes, it’s a little goofy celebrating it in Chicago in midwinter, but any excuse to celebrate, right?

 People ask a lot how I do all this stuff, so I must periodically make clear that my life wouldn’t function if Kevin couldn’t feed himself and the kids as needed. Sometimes he’s cooking from scratch, and making well-balanced meals or fresh-baked bread; sometimes he’s throwing some frozen peas on the plate and calling it a day. That’s parenting for both of us around here. But I can go out of the country for a week, or spend all weekend at holiday fairs, and I know that as long as Kev’s not cross-scheduled (we do have to be a little careful about that), he’ll get the family fed. It’s not nothing.
 Peppermint marshmallows, two ways. I asked Kavi which she liked better, and she couldn’t decide — the peppermint swirl ones are more intensely peppermint; the chocolate-peppermint ones actually have more peppermint (same marshmallows, plus bits on top), but the dark chocolate has a strong enough presence that the overall effect is less peppermint-y.