 (30 minutes draining time + 30 minutes, serves 6)
My mother’s eggplant curry was always a huge hit at Sri Lankan dinner parties, and is particularly popular with vegetarians.
1 lb eggplant, roughly 1-inch cubes
1 tsp turmeric
1 tsp salt
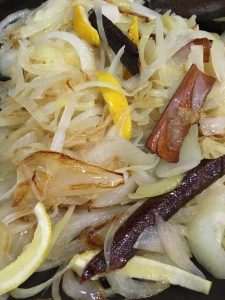
2 onions, coarsely chopped
1/2 cup oil or ghee
1 tsp cumin seed
1 tsp black mustard seed
1 dozen curry leaves
1 tsp brown sugar
1 tsp Sri Lankan curry powder
1/2 cup coconut milk
1. Prep eggplant — rub with turmeric and salt and then set in a colander to drain at least 30 minutes, which will draw out the bitter water. Blot dry with paper towels.
2. Sauté onions in oil on medium-high, stirring, with cumin seed, black mustard seed, and curry leaves, until golden.
3. Add eggplant, sugar, and curry powder, and sauté for another ten minutes or so, until eggplant is nicely fried. (Add more oil or ghee if needed.)
4. Add coconut milk and simmer for a few minutes until well blended. Serve hot with rice or naan—particularly nice for a vegetarian dinner with lentils as the main protein.
Variation: Eggplant and bell pepper work well together in this dish; just add chopped bell pepper about five minutes into frying the eggplant for a nice sweet element to the dish. Sometimes I make a nightshade curry, adding potatoes and tomatoes as well — small cubed potatoes would go into the onions first, then eggplant and spices, then bell pepper, then tomato, with a few minutes between each addition.
NOTE: I was wanting something a little spicier, so this time I added some chopped green jalapeños when I added the eggplant. Yum.
 (60 minutes, serves six)
 Experimenting with tofu shirataki noodles (shirataki is made of yam, and is extremely low-carb, low-calorie, and gluten-free); here I added them to a simple Thai yellow curry.
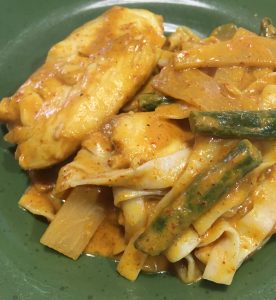

 (20 minutes, serves 4)
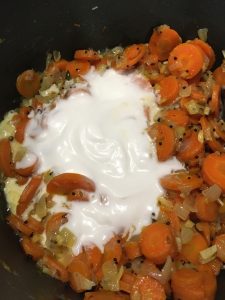
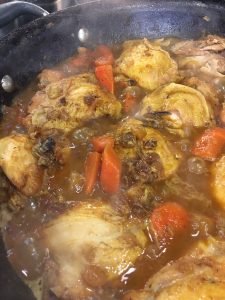
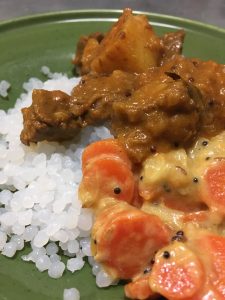
 This may be the most iconic flavor combo of my childhood — beef curry with carrot curry on rice. I think my mom made it close to weekly, and the two flavors go perfectly together — the savory spice of the beef with the sweetness of the carrots cooked in coconut milk.
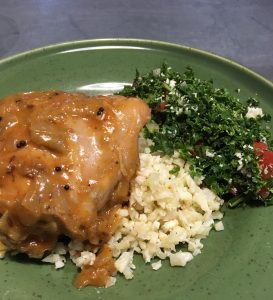
 Five minute dinner — well, mostly because of leftovers and accompaniments. I had some rice + quinoa leftover from yesterday, and a little kale salad, and of course, I try to keep myself stocked with coconut sambol and seeni sambol in jars in the fridge.
 (2 hours, serves 6)