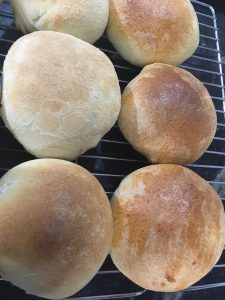
Keto ‘Naan’
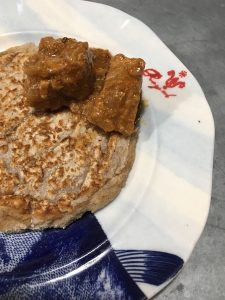
Made coconut flour keto ‘naan’, out of curiosity. It’s not naan, but it’s good! A little odd, and definitely soft — you have to be careful flipping it, or it will tear / mush. The texture isn’t really bread-like — closer to injera, maybe.
But I actually kind of love the sweetness of the coconut with a tangy pork curry. If you’re looking for a gluten-free (or higher-fiber) desi bread-like option, this is a good one; I might even make it again myself.
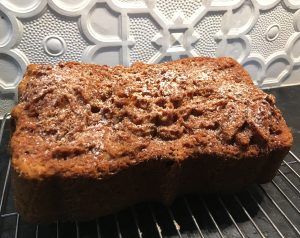
Desi-Spiced Carrot Bread
Our farmshare is producing quite a lot of carrots at the moment, so I’ve turned to quick bread. The nice thing about it is that you can make a double or even quadruple batch, and it takes just about as long to make, and then you have lots to freeze for a hungry day or give away. This quick bread is a pretty healthy option for breakfast or to tuck into a kids’ lunchbox, though I’ll note that my kids did complain about the cranberries. Know your audience, and skip or substitute as desired!
I really love it with a limey glaze; I think the tartness is the perfect complement to the sweetness of the bread. But you can certainly leave the lime juice out if you prefer.
1 c. shredded carrots (easiest in food processor)
2 large eggs
1/2 c. vegetable oil
1/2 c. Greek yogurt or sour cream
1/2 c. grated coconut (not sweetened!)
1/2 c. chopped cashews (roasted/salted is fine)
1/2 c. dried cranberries (I like the tartness, but sultanas would be more traditional for desi flavors, and really, any dried fruit would do
1/4 c. chopped crystallized ginger
1 t. vanilla
1 1/2 c. flour
3/4 brown sugar
1 t. baking powder
1/4 t. baking soda
1/2 t. fine salt
1 t. cinnamon
1/4 t. cloves
1/4 t. nutmeg
Glaze (optional):
1/2 c. powdered sugar
1 1/2 T whole-milk yogurt
1-2 T lime juice
1. Preheat oven to 350. Spray baking pan with Baker’s Joy (or butter and flour the pan). You can use various pans: mini-muffin, muffin, mini-loaf, loaf; just adjust the timing appropriately.
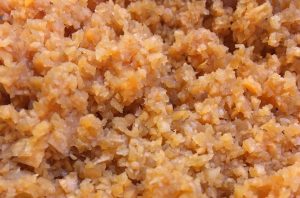
2. In a large bowl, combine the carrots, eggs, oil, yogurt / sour cream, coconut, cashews, dried fruit, ginger, and vanilla.
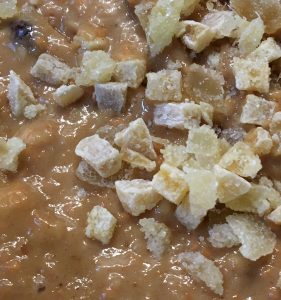
3. In another bowl, mix together the flour, sugar, baking powder, baking soda, salt, cinnamon, cloves, and nutmeg.
4. Add dry to wet and stir with a wooden spoon until just combined. (Don’t beat too long or too vigorously.)
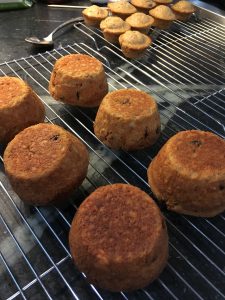
5. Pour the batter into the pan(s) and bake at 350 until done (test with toothpick):
Mini-muffins: 15 minutes
Muffins or mini loaves: 20-25 minutes
Loaf pan: 45-55 minutes
6. Turn onto a rack and let cool.
7. Glaze (optional): stir together the glaze ingredients and drizzle over the top of the bread. Enjoy!
(Once cooled, may be frozen for up to six months.)
Hoppers / Appam
If I had to pick the perfect Sri Lankan meal, this would be it. There’s nothing like breaking off a crisp piece of hopper, dipping it into broken egg, and scooping up some curry and a bit of seeni sambol. Delectable.
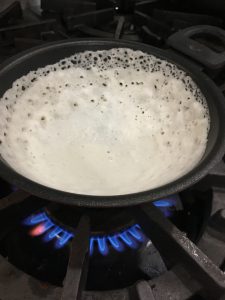
These rice flour pancakes have a unique shape; fermented batter is swirled in a special small hemispherical pan, so you end up with a soft, spongy center, and lacey, crispy sides — that contrast is the true glory of the hopper. Typically you’d make one egg hopper per person, plus another plain hopper or two, and maybe a sweet hopper to finish up.
If you don’t have a hopper pan, you can make hoppers in a regular frying pan; you just won’t get quite as much of the crispy sides. It’s a little time-consuming to make hoppers, since each one must be individually steamed for a few minutes, but with practice, you can have four hopper pans going on a stove at once. I’d recommend starting with just one pan at a time, though! Serve with curry and seeni sambol.
2 cups South Asian white or red rice flour (or a mix of rice and wheat flour)
1 tsp sugar
pinch of baking powder
1/2 tsp salt
2 cups coconut milk
eggs for egg hoppers
extra coconut milk and jaggery for sweet hoppers
1. Mix first five ingredients thoroughly in a large bowl, cover, and set in a warm, turned-off oven to ferment overnight. (In a cold climate, fermentation may not occur without a little help—I turn my oven on to 250 degrees, and when it’s reached temperature, turn it off and put the covered bowl in the oven to stay warm.)
2. Mix again, adding water if necessary to make a quite thin, pourable batter.
3. Heat pan (grease if not non-stick) on medium, and when it’s hot, pour about 1/3 cup batter into the center. Pick up the pan immediately and swirl the batter around, coating the cooking surface. The sides of the hopper should end up with holes in them: thin, lacy, and crisp – if the batter is coating the pan more thickly, mix in some hot water to thin it down. Cover and let cook for 2-4 minutes — you’ll know it’s ready when the sides have started to brown and the center is thoroughly cooked. A silicone spatula will help with getting the hopper out of the pan.
4. For egg hoppers, after swirling, crack an egg in the center before covering. The egg will cook as the hopper does, finishing in about 3-4 minutes.
5. For sweet hoppers, after swirling, add a tablespoon of coconut milk and a teaspoon of jaggery to the center of the pan, then cook as usual.
If you don’t use all the batter right away, you can store it in the fridge, but it will keep rising, so make sure there’s some room in your storage container for that, and then you’ll want to thin it back down to pouring consistency with another 1/4 – 1/2 c. of water before use.
NOTE: If you use instant hopper mix, I found that a packet (about 3 cups of mix) used 2 cans of coconut milk plus 2 – 2 1/2 cups of water.
Experiments in Browning
I have a friend whose daughter is allergic to eggs, which led me to wonder about the classic egg wash, used to add lovely color to breads. I did a little research, and learned that you can do a wash with egg whites only, with heavy cream, even just with milk (done when funds are tight).
In this first photo, the curry buns on the left were baked with no wash at all; the ones on the right with a traditional egg wash. Interestingly, the bottom left one did brown a little, but certainly you got a more consistent, richer result from the egg wash.
Then I tried using just whites, and just heavy cream. The whites browned almost as well as the traditional egg wash; the heavy cream gave a little color, but I’m not sure it’s enough that I’d bother with it, honestly.
No real conclusions here — but it was fun experimenting!