Imagining people opening these packages with delight

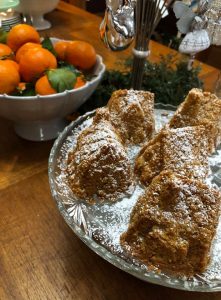
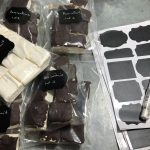
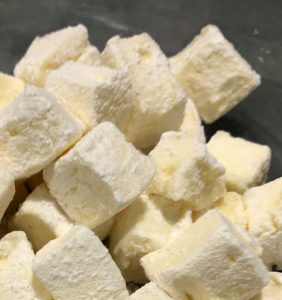
Tamarind-chili marshmallows — they look a little deflated in the mixed sweets bags compared to the other marshmallows, and I hope people don’t mind — that’s just what the tamarind does to the marshmallow. It still tastes good, I promise, even if it’s not quite as fluffy.

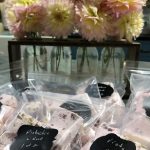
It’s so satisfying, packing up these larger packages, with the sweets and the soaps and all; I’m just imagining people opening them on the other end, hopefully with delight. 

#serendibkitchen
#serendibhome

This didn’t quite work

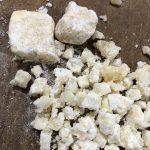
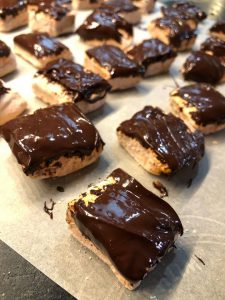
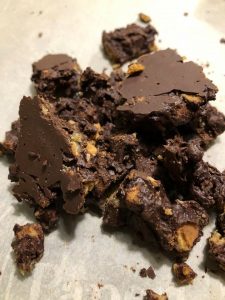
This is an experiment that didn’t QUITE work — I wondered if I could make a sort of bark with milk toffee and chocolate. I usually have a lot of milk toffee bits left after cutting it into squares, and while Anand is happy to eat them all right out of the bowl, it seemed like they might be useful in something.

I have to admit, while it tastes fine (and bittersweet chocolate actually does a good job of balancing the sweetness of the milk toffee), I *almost* didn’t even eat it, because it looked so bad when I was stirring it in the bowl. I mean, it didn’t really look like food!

It looked better once spread out on parchment, hardened, and cut up into bark pieces. But still, I’m not sure I’d make it again. Maybe I’m just shallow — I want my food to look good too.

If you have milk toffee bits left over, I’d recommend stirring them into vanilla or dark chocolate ice cream instead.

#serendibkitchen

Sweet Treats and Island Relaxation

We’re really getting very close to finishing Kickstarter shipping on Feast. All the simple packages have been done, and now we’re finishing up the fancier ones, the Sweet Treats and Island Relaxation packages. Gods willing, those will all be going out by Wednesday this week, when the USPS pick-up is scheduled. Some of the marshmallows are pictured below — gingered chai and honeyed rosewater with saffron. Mmm…

Then we’ll just be left with the ‘problem cases,’ where for whatever reason, something is unclear. Addresses missing, orders that don’t seem to match up pricing and items, etc. — we’re going to have to write back to a few dozen people and try to sort out what happened on those.

We’re trying to get these sorted as fast as possible, but we’ve been fighting various illnesses around here that are really slowing us down — poor Stephanie got here and started working this morning, and then got felled by a migraine; she kept trying to power through, but eventually admitted defeat (a solid hour after I told her to just go home and rest…).

It’s hard to stop when we’re so close to the end, but at the same time, if we work tired and brain-fuzzled, we’re just going to make mistakes that will require fixing later. We’re double-and triple-checking every order and still, I’m sure some errors slipped through. If you didn’t get something you ordered, then PLEASE, let us know, and we will do our best to make it right!

#serendibkitchen

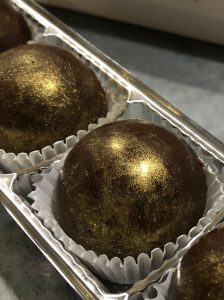
Gold-dusted, chocolate-covered coffee beans

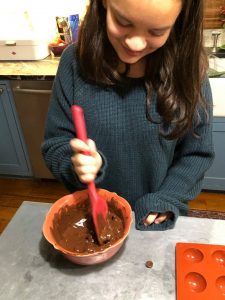
So, Anand is in 4th grade and Kavi is in 7th grade. Anand’s current teacher happens to be Kavi’s favorite teacher ever, and it’s that teacher’s birthday today. Kavi really wanted to make her a present. The teacher likes Star Wars, her college, and coffee — we couldn’t figure out what to do on short notice with the first two, but coffee seemed do-able. So last night, we took 30 minutes (most of that was waiting-for-the-chocolate-to-set time) and made some chocolate-covered coffee beans.

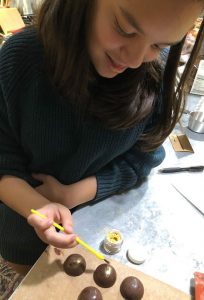
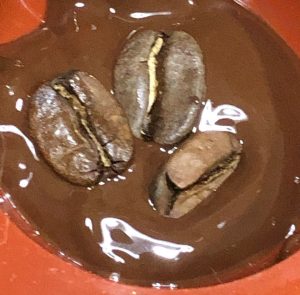
Instructions: Melt chocolate for 2 minutes on 1/2 power in the microwave; stir until melted, putting back into microwave for 30-second intervals at 1/2 power if needed. (I think it took us about 3 minutes total, but microwave powers differ). Spoon a little into each mold, add coffee beans, spoon the rest of the chocolate to fill the molds. (Two cups of chocolate chips filled a tray of 15 chocolates for us.) Move to fridge until set (maybe 10-15 minutes). Unmold and brush with gold dust.

It’s probably not the best way of infusing coffee into a chocolate, as the end result is a bit crunchy! But I didn’t have a lot of energy for experimenting with actual recipes for things like coffee cream last night, so this had to do.


I happened to have these sweet containers on hand for the upcoming Colorful Holiday fair (I’m thinking I want to try making passionfruit chocolates — either passionfruit cream or with dried passionfruit or possibly both!), so we were able to package it up nicely.

The edible gold luster dust makes it look quite fancy! And Kavi did it all, start to finish, herself (including writing her teacher the SWEETEST note). She particularly enjoyed popping the chocolates out of the mold, and painting on the sparkly edible dust. (If you look carefully, you may note that she put some sparkle dust on her lips too at some point when we were waiting for the chocolates to be ready to unmold…)


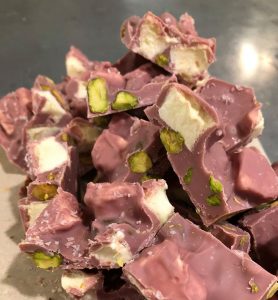
Ruby-Passionfruit Bark, with Pistachios

Ruby-Passionfruit Bark, with Pistachios

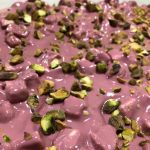
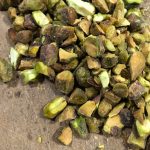
These are pretty perfect. I love that I’ve found a good use for the off-cuts from the trays of passionfruit marshmallows, and the way they complement the tang of ruby chocolate? Mmm…. I did these with cashews before, which are tasty, but I love the tiny little edges of green contrasting the pink and white on the pistachios. The pink-green-white colors make it very tropical-Christmas appropriate, I think.  I didn’t really measure, so this is only an approximate recipe, but hopefully enough to give you a sense of it.

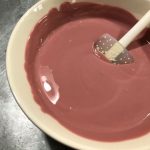
1. Melt ruby chocolate chips in a microwave at half power, stirring until liquid and smooth.

2. Gently stir in chopped passionfruit marshmallow bits and chopped pistachios. (Recipe for passionfruit marshmallows at the Serendib Kitchen site.)

3. Spread on a sheet of parchment paper and let set (faster in the fridge). Cut into pieces, sprinkle with flake salt, and serve!

Spiced chocolates

Spiced chocolates. Nothing fancy here — melt some dark chocolate chips at half power in the microwave, stir in cinnamon, cloves, and fresh-grated nutmeg (would’ve added ground cardamom if I had any on hand), pour into molds and leave in fridge to set.

Definitely faster and much less labor-intensive than making them into individual truffles, though I’m not sure I love the shiny finish on these — it mars really easily, for one thing. But the little paisley shapes are v. cute, and sprinkling with flake salt is both delicious and camouflages any little imperfections.

Cinnamon-Tossed Mulled Apple Cider Marshmallows

Cinnamon-Tossed Mulled Apple Cider Marshmallows

Kavya has a new favorite marshmallow! For a long time, passionfruit marshmallows topped her list, but yesterday, they were unseated unceremoniously by the flavor of the season. 

(I like these a lot, but passionfruit is still the queen of my heart.)

1 c. apple cider
1 stick cinnamon
6 cloves
3 packages unflavored gelatin
1/2 c. water
1 1/2 c. sugar
1/2 c. light corn syrup
1/4 teaspoon salt
butter (for greasing the pan)
cinnamon powder for dusting (a few T)
powdered (confectioner’s) sugar (about 1/2 c.)

1. In a small pot on the stove, heat cider with cinnamon and cloves. Bring to a boil, turn down to a simmer, and simmer 10 minutes or so. Remove 1/2 c. for marshmallows, sieving out any whole spices; drink whatever remains. (Can be done in advance — in my case, I mulled a bigger pot of spiced cider to enjoy straight up on a cold day, and just set some aside for marshmallows.)

2. Empty gelatin packets into bowl of stand mixer (whisk attachment), with 1/2 c. mulled cider. Stir briefly to combine.

3. In a small saucepan (a bigger one will be heavy and hard to hold steadily at a later stage) combine water, sugar, corn syrup, and salt. Cover and cook over medium high heat for 4 minutes. Uncover and cook until the mixture reaches soft ball stage (240 degrees if you have a candy thermometer), approximately 8 minutes. Once the mixture reaches this temperature, immediately remove from heat; if it continues, it will swiftly turn into hard candy.

4. Turn mixer on low speed and, while running, slowly pour the sugar syrup down the side of the bowl into the gelatin mixture. (Be very careful with the sugar syrup, as it is scaldingly hot and will burn you badly if it gets on your skin.) Once you’ve added all of the syrup, increase the speed to high.

5. Continue to whip until the mixture becomes very thick and is lukewarm, approximately 12 minutes. Add food color if desired — if not, they’ll be white.

6. While it’s whipping, butter a large 9 x 12 pan. Prepare an oiled spatula. Pour the mixture into the prepared pan, spreading it evenly (and swiftly) with the oiled spatula.

7. Sprinkle with ground cinnamon and dust the top with enough of the powdered sugar to lightly cover. Reserve the rest of the powdered sugar for later. Allow the marshmallows to sit uncovered for at least 4 hours and up to overnight.

8. Turn onto a board, cut into squares, and dust all sides of each marshmallow with the remaining powdered sugar, using additional if necessary. May be stored in an airtight container for up to 3 weeks, or frozen.

#blog
#serendibkitchen

Marshmallow-rocky road experiments!

I’ll have to make this again so I can write it up into a proper recipe, but here are the marshmallow-rocky road experiments. I made three different varieties; the clear favorite was the ruby chocolate with passionfruit marshmallows and dried mango. Mmmm….so good! I served these at the Feast packing party, and they were quickly devoured by my hardy volunteers.

Rocky road is so simple to make, and great to use up leftover bits of nuts and fruit and mango. Melt chocolate on half power in microwave, stirring every 30 seconds after the first minute, so as to not burn it. When it’s melted, stir in whatever bits you like; you can keep adding until it’s mostly bits with a thin coating of chocolate. Spread on a sheet of parchment paper, stick in the fridge and let it cool. Snap apart (this part is fun) or cut into squares (which is cool for showing the cross-sections), and serve.

I wish the new ruby chocolate was more widely available; right now, I mostly have to order the bags of chips online, though sometimes I can find a bar in a grocery store. I love its fruity tang; I think it might be my favorite chocolate now.

The other versions were good too, but in retrospect, I think the dark chocolate + cashew version would’ve been better with a sprinkling of flake salt over the top, and possibly a bit of cayenne mixed in. Ditto salt on the ruby chocolate and cashew, though I wouldn’t use the cayenne for that.

I could barely taste the dried coconut in one batch of ruby chocolate rocky road, so not sure it’s worth adding unless you use more / bigger pieces. Ditto the candied ginger in the dark chocolate actually, which surprised me — just need more, I think. MOAR GINGER.

#serendibkitchen
#blog
#experimenting

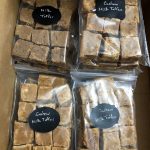
Milk toffee, and checking things off the list: very satisfying!

Milk toffee, with and without cashews, done! Very satisfying, checking things off the checklist. This really is one of my favorite desserts ever — I’ve been nibbling off-cut crumbly bits for a solid week now, and I’m not bored with them yet. There’s something about the texture that’s particularly appealing; sort of halfway between fudge and maple candy.

And while I was happy to make some without cashew for those who don’t like nuts (insert standard legal disclaimer that these are all made in a home kitchen and that I can’t guarantee anything I ship out is completely nut-free), the cashews really do make this sweet particularly luscious. The New Orleans praline version with pecans is also good, but I like our cashew version better. 

Milk Toffee recipe: http://serendibkitchen.com/2017/12/12/milk-toffee/