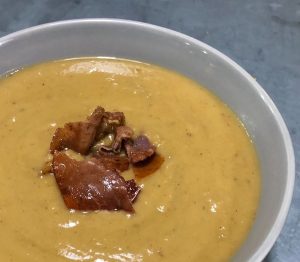
Curried Chestnut, Leek, and Carrot Soup, with Fried Prosciutto (or Sautéed Mushrooms)

The semester is over, so I had time to actually come up with a new recipe tonight, for a curried chestnut soup.  So seasonal!

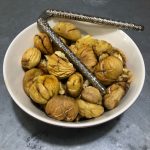
You can roast the chestnuts yourself — a little more effort, but it’s tasty to peel and eat some of that sweet nuttiness while it’s hot. Just be careful when cutting crosses into the chestnuts before you roast, so your knife doesn’t slip. Or you can buy a jar of them already roasted, though you may need to find a specialty shop for that. If you cleverly reserved turkey stock after Thanksgiving, you could pull some out of the freezer and use it for this. That was my plan, but I forgot to freeze the extra stock until it was too late this year. Oh well.

I used Sri Lankan roasted curry powder, but I think any standard South Asian curry powder would be tasty. The complex spicing balances the sweetness of the chestnuts and the saltiness of the prosciutto (or the mushrooms sautéed in butter with salt). Substitute in vegetable oil, vegetable stock, and coconut milk to make this a filling, nutritious, and delicious vegan meal.

*****

Curried Chestnut, Leek, and Carrot Soup, with Fried Prosciutto (or Sautéed Mushrooms)
(serves 4, about 30 minutes (aside from chestnut roasting time))

3 T unsalted butter
2 leeks, white parts sliced thin
2 carrots, peeled and chopped finely
1/2 t. salt
1 t. pepper
about 15 oz. (3 c.) roasted and peeled chestnuts
6 c. chicken stock
1 t. curry powder
1/4 c. heavy cream
additional salt and pepper to taste
1/2 t. lime juice
Optional: either fried prosciutto or mushrooms sautéed in butter for garnish — make them while the soup is simmering

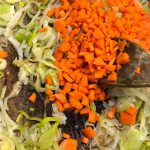
1. Heat butter in large soup pot and stir in leeks, carrots, salt, and pepper. Sauté, stirring, about 5 minutes.

2. Add chestnuts and chicken stock, bring to a boil, then turn down to a simmer. Simmer for 20-30 minutes.

3. Transfer soup carefully to blender — I’d use a large ladle rather than trying to pour a pot of hot soup! (If you have an immersion stick blender, that’s even easier.) Purée, and return to pot. (It’s fine to leave a cup or so of broth in the pot; just stir it into the purée when you return it to the pot.) Add cream and stir. Taste and add salt / pepper as desired; if the soup is too thick, add a little more stock. Stir in the lime juice and simmer a few more minutes, until well blended.

4. Serve hot, garnished with prosciutto or mushrooms. (I don’t recommend both together — I tried it, and oddly, they clash.) If you want to make it even prettier, you could drizzle a little cream into the bowl, or add a scattering of chives. Mmm….

Simple comforts: improvising and using what you have

As part of this publishing-a-cookbook thing, I’ve learned a lot more about how people approach food and cooking. It’s made me really sad, learning just how many people never learned how to improvise tasty meals out of what’s in the fridge, or from leftovers. It can be a huge timesaver and moneysaver, letting you use up ingredients efficiently (almost nothing in our fridge ever goes bad), while still keeping plenty of delicious variety in weekly meals. A well-stocked spice cabinet lets you bring in lots of international flavors too!

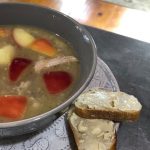
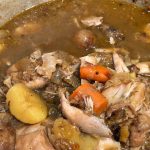
Pictured below are three dishes we made post-Thanksgiving with the leftover turkey: Thai yellow curry turkey, with plenty of veggies, served with a little rice. Turkey and bacon with broccoli and pasta in a Parmesan-y white sauce, which the kids devoured. Turkey mulligatawny soup with apples, mild enough to feed my in-laws, but with enough South Asian flavor to make me happy.

None of these are difficult, but I didn’t have a recipe for any of them; after many years of cooking, I just know how to take leftovers and make up dishes with them. And this isn’t because I’m some sort of fabulous cook — it’s the kind of basic home-cooking skills that I have to think were common across America a few decades ago, and which seem to have gotten lost a little along the way. I didn’t actually learn how to do this growing up, but picked it up in my 20s and 30s. I started with recipes, but over time, learned enough basic approaches to food to not need recipes most nights.

Take the Thanksgiving turkey, for example. Okay, so you make a turkey, you feed a lot of people for dinner, it’s the end of the night. What next? Well, in my house, we pick the meat off the bones, as much as you can. If you’re fastidious, you can use a knife and fork for this, but it’s easier to do thoroughly with your clean hands. Put all the meat in a storage container in the fridge, wrap up the remaining carcass in foil and throw it in the freezer. Go to sleep, replete.

The next day, turkey sandwiches are classic and so satisfying. There are lots of interesting recipes online, but I’m perfectly happy with some good white bread, mayo, turkey, and cranberry sauce. I’m too tired to cook the day after Thanksgiving, but honestly, I’m mostly just eating stuffing out of the Pyrex, standing in the kitchen with a fork.

By day three, if you’re like me, you’re craving something spicy and also easy, because you don’t really want to do a lot of cooking yet. Thai curry to the rescue — Thai curry paste makes the seasoning part easy (I like Maesri brand), and it’s a one-pot dish. Thai curries kept us going through the infant / toddler years — Kev and I probably made one at least once a week, and managed it through a sleep-deprived haze. Kev actually made this one — he texted me when I was coming home on the train and asked what I wanted for dinner — I requested Thai yellow curry, and thirty minutes later, walked in the door to this.

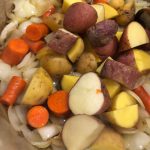
Add a can of paste and a can of coconut milk to the pot, bring to a boil, add in some turkey, chicken broth, and whatever random veggies you have on hand that you want to use up, bring to a boil, simmer 20 minutes. (Carrots and potatoes and such, put it in with the turkey, since they’ll need longer cooking; bell peppers and green veggies, add near the end, so they don’t get mushy.) Nice additions include a can of bamboo shoots, drained, a little fish sauce, some brown sugar, Thai basil if you can get it, Italian basil if not. Crushed chili peppers if you want it spicier.

Put on some rice (which will also take 20 minutes to cook), or if you really want it one pot, you can add rice noodles directly to the curry in the last few minutes of cooking. The whole thing takes 30 minutes tops. Once you’ve made a Thai curry from a recipe a few times, you can probably do this without a recipe, and without thinking very much; a pot of this will provide several meals, so that should hold you a day or two. We keep several cans of Thai curry paste in our pantry (yellow, red, green, panang, massaman) at all times, and a good supply of Chaokoh coconut milk.

But the kids don’t like Thai curry, you say? No problem — that’s when you boil some pasta — rotini, penne, whatever you like. I always set a timer for the boiling, so I don’t lose track while doing other cooking and end up with mushy noodles, yuck.

In a separate pan, sauté some bacon (because turkey on its own can be a little dry) and add the turkey. Then you make a sort of roux — put a tablespoon or two of flour in the pan, sauté it in the bacon fat (add oil or butter if needed), stirring until it browns a bit, a minute or two, then add enough milk (maybe a cup?) and stir to make a creamy sauce.

I think I was in my 30s before I learned how to do this — ‘roux’ sounded so fancy and sort of intimidating. But it is EASY and the resulting sauce is fabulous for rejuvenating tired pasta, meats, veggies, etc. I am pretty sure this is technically a béchamel, one of the French mother sauces, which also sounds fancy and intimidating, but don’t let that fanciness get in your way! Fat + flour + milk. That’s all it is. (If you add gruyere cheese or white cheddar, it becomes a Mornay sauce. Extra-fancy.)

Grate in some Parmesan for extra yumminess (you can use the shaker-style Parmesan if you’re tired, but it doesn’t blend quite as well; it stays a little gritty because of additives they use to keep the cheese in the shaker from clumping). If the sauce gets too thick, add more milk and stir it ’til well blended (and maybe turn down the heat).

Taste — add salt / pepper as desired, then stir in the pasta. I had some leftover cooked broccoli, so I added that too — frozen peas are also a standard addition to this kind of thing around here. We make some version of this pretty often with the leftovers from the cooked rotisserie chicken we pick up at the grocery store, maybe every two weeks? It’s a staple in our house.

There are a lot of ways these dishes can go wrong, of course, and that’s the bit where I think people often get frustrated and give up. They put green veggies in too early, and so they come out mushy and flavorless. They cook the dish on too high a heat, or get distracted by the baby or the internet, so the sauce scorches. (Timers are your friend. Also stirring.) They forget the salt (it’s not as good if you just shake it on after cooking is done), or worse, put in too much salt accidentally (hard to recover from).

And when you’re cooking tired, or in a hurry, you’re more likely to make that kind of mistake, and more likely to get really frustrated when you do, so there’s a class-based element to this that I want to highlight. It’s so much easier to become a good cook if you have the time and energy to spare for the learning.

Which is a sort of horrible catch-22, because not knowing how to do this kind of cooking leads so many 20-somethings and 30-somethings to rely on a lot of takeout, which ends up costing them much more money in the long run. I feel like we really did an entire generation a massive disservice when so much of schooling switched over to college prep and cut home ec (and shop!) to make room in the curriculum. I don’t know what it would take to bring all of that back to the public schools, along with basic civics and budgeting, but I’d like to see an effort.

I mean, I teach college, and I do think the students learn something worthwhile in my English classes. But as a parent myself, I want to launch my kids with better-than-basic domestic skills, as well as the ability to write a coherent, well-argued paper utilizing strong critical thinking skills. Do we really not have time to teach both?

The last dish here is the soup, made with turkey stock. That’s for a weekend day, maybe the week after Thanksgiving, maybe months later. That turkey carcass will be good for quite a while! You pull it out of the freezer, throw it in a big pot with plenty of water and some coarsely chopped onions.

Depending on what ethnic direction you’re leaning in for the meals that follow, pick your additions — carrots are often good, or celery. They’ll all basically dissolve, along with the onions, making the stock flavorful, and if you want, you can just fish them out at the end, though I don’t generally bother. I wanted South Asian spicing for my soups, so I went mulligatawny-style: garlic, ginger, cinnamon, cloves, cardamom pods, plenty of black pepper, salt. Bring it to a boil, let it simmer, 3-4 hrs. Now you’ve got a great turkey stock. Portion whatever you’re not using right away out and freeze it for a tired day.

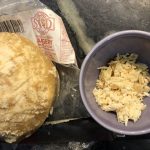
I made the soup just a week or so after Thanksgiving, so we still had some turkey meat left in the fridge. (Some people aren’t comfortable eating meat that’s been in the fridge for a week; our stomachs are fine with it, but use your judgement and experience here!) So this was just the easiest thing to do for my visiting in-laws; heat up some stock, simmer the turkey in it for 15-20 minutes or so, add some quartered apples and cook just until they’re softened, but still have some bite to them. Serve hot; we added some buttered French bread, which felt oddly appropriate for a colonial soup. And very tasty.

There was plenty of stock left for several more soups later in the year, when the nights get long and cold and dark, and all you want is to huddle around a tasty warm bowl of soup.

Simple comforts — at least, they ought to be simple. I wish they were for everyone.

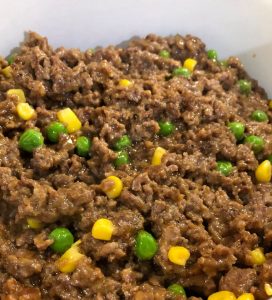
Sri Lankan Shepherds’ Pie

Sri Lankan Shepherds’ Pie
(15 minutes cooking time + 40 minutes baking / cooling)

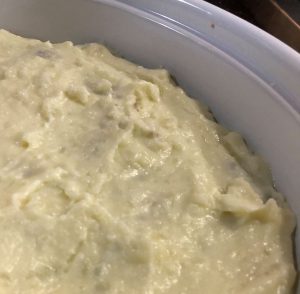
Usually mashed potatoes go pretty fast around here, but we made so much for Thanksgiving that we actually had some leftover. Shepherd’s pie to the rescue — but I had a long work day today, so I wanted a version that required the minimum of actual cooking.

Could I avoid chopping onions and carrots the way we usually would for shepherds’ pie, and still come up with a tasty dish? Yes, as it turned out, if I combined it with the approach we use for ginger-garlic chicken. Though if you don’t have leftover mashed potatoes, you’ll need to make them fresh, which will add a bit of cooking time, I’m afraid.

Ingredients:

2-3 cups leftover mashed potatoes
1.5 lbs ground lamb (you could use beef or another meat instead instead)
1 heaping teaspoon ground ginger
1 heaping teaspoon garlic powder
1 teaspoon salt
1/2 – 1 t. black pepper (or cayenne)
1 teaspoon Sri Lankan curry powder
2 T flour
1/4 c. ketchup
1/8 c. Worcestershire sauce
1 c. chicken broth
1 T lime juice
1/2 c. frozen peas
1/2 c. frozen corn

NOTE: If you don’t have leftover mashed potatoes, boil the potatoes and mash them first, before starting the meat, as there isn’t really a good pausing point during the meat-cooking process.

1. Set oven preheating to 400F. Turn lamb into a sauté pan, add ginger, garlic powder, salt, pepper, and curry powder, and fry on high until browned — the lamb should give off enough oil that you have no need for more, although do add oil if needed.

2. Add flour and stir for a few minutes, until flour is browned and the ground lamb is thoroughly coated.

3. Add ketchup, Worcestershire sauce, and chicken broth; cook a few minutes, stirring, until well-blended. Simmer a few more minutes until liquid thickens into a sauce. Add lime juice, stir, and adjust seasonings to taste. If there’s excess oil, blot it up with a paper towel or skim it off at this stage.

4. Stir in frozen peas and corn until well blended. Turn off heat and turn mixture out into a casserole dish. Spread with mashed potatoes.

5. Bake at 400F for 25 minutes, until top of potatoes are golden brown. Remove from oven and let cool (and set) for 15 minutes. Serve hot.

Chicken Mulligatawny (Soup or Stew)

Chicken Mulligatawny (Soup or Stew)

This is a great recipe for a slow weekend. Yesterday, I made enough to feed soup to the people who were over for afternoon board games, then added some rice, lentils, and coconut milk, turning it into more of a stew, and took it to the potluck last night.

This morning, I scooped out four Ziploc bags’ worth and stored them flat in the freezer (careful not to scoop up the potatoes and carrots, which don’t freeze well), saving them for a rainy day when I’m too tired to cook and want some hearty, easy comfort food. And there’s just enough left for lunch today. 

Many mulligatawny recipes add apples, which would be a fun fusion approach — mulligatawny is thought to be a colonial-era adaptation of earlier South Asian soups like rasam, and is often vegetarian. But I chose to go with chicken, carrots, and potatoes this time. Yum.

(This recipe is gluten-free, and I’m planning to include it in the new gluten-free ebook.)

*****

INGREDIENTS

BASE SOUP:
– 1/4 c. vegetable oil or ghee
– 2-3 onions, chopped coarsely
– 3 cloves garlic, chopped
– 1 T ginger, chopped
– 1 stick cinnamon
– 3 cloves
– 3 cardamom pods
– 1 t. black mustard seed
– 1 t. cumin seed
– 1 T ground black pepper
– 4 c. chicken (or vegetable) stock
– 2 c. (or more) water
– 1 tomato, chopped
– 1 T tamarind paste

ADDITIONS:
– one roasting chicken, cut up, skin removed
– 3 carrots, cut in chunks
– 4 – 6 new potatoes, cut in chunks
– 1/2 – 2 c. lentils (optional)
– 1/2 – 1 c. rice (optional)

FINAL SEASONINGS:
– 1-2 t. salt (to taste)
– 1-2 T lime juice (to taste)
– 1 c. coconut milk (optional)

1. Sauté onions, garlic, ginger, mustard seed, cumin seed, cinnamon, cloves, cardamom, and black pepper on medium-high until onions are golden.

2. Add potatoes, carrots, and chicken pieces (on the bone), turn up the heat to high, and sauté for a few minutes, stirring occasionally as you brown the chicken (careful not to burn).

3. Add stock and water and bring to a boil. Stir in tomato and tamarind paste, and lentils if using. Cover and cook at a simmer until chicken is cooked through, about 20 minutes.

NOTE: Lentils may need a bit longer, depending on how soft you want them — just add more water, bring it up to a boil, and then turn down to a covered simmer, until lentils are as soft as you like.

4. Remove chicken pieces to a bowl and let cool. Remove meat from the bones, shred with your fingers, and add meat back to the pot. Taste and add salt / lime juice as desired.

NOTE: If using lentils and/or rice, you’ll probably want to add more tamarind or lime juice, and/or bump up the pepper — adding lentils / rice will mute the overall flavor of the dish.

5. If using rice to make it more of a stew, add the rice now, bring the pot back to a boil (adding water and/or coconut milk if needed), cover, reduce heat to simmer, and cook an additional 15-20 minutes, until rice is cooked.

6. Serve hot! Toasted naan would be nice as an accompaniment to the soup, and if you’re feeling fancy, you could top each bowl with a dollop of yogurt and a scattering of chopped cilantro.)

#serendibkitchen

Sri Lankan lentils without coconut

What if you want to try Sri Lankan food, but are allergic to coconut? At some point when I have free time (hah), I’d love to create a section of the Serendib Kitchen website that suggested adaptations. (Stephanie, add to queue?) Vegetarian / vegan, allergies, low-carb / keto, etc. For example, yesterday I was cooking dinner for 30 students, for my colleague Anna Guevarra‘s food and culture class, and there were a few restrictions we had to work around:

We had:
– a vegetarian (so I just kept it all vegetarian, super-easy to do well with Sri Lankan food)
– a cashew allergy (so we skipped the cashews toasted in ghee for the rice pilaf, and it was still good with saffron, rose, and sultanas), and
– a coconut allergy.

Now THAT one is tricky, as I’d learned back when I was cooking for my roommate Cliff Winnig, also allergic to coconut! (And nutmeg, and nuts — he says he had a lexical allergy…) We could just leave the coconut out of the kale mallung, bumping the sugar up a bit to compensate for the sweetness. It’s still tasty and worth making, but honestly, it’s not as good as it is with coconut, and so far, I haven’t come up with anything that would really work as a substitute.

But for the dal (lentil curry), it proved surprisingly easy to compensate for lack of coconut milk. I started with using cow’s milk instead, but as I asked the students, there’s still two major elements missing that we’d want to add back in. After a few moments, they correctly identified them.

Want to try to guess before reading further?

(The pictures may have given you hints!)

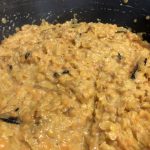
1) Sweetness, since coconut milk is sweeter than cow’s milk. We added in a little sugar, in the form of grated jaggery, and that worked very nicely to bring out the sweetness of the onions and help balance the dish.

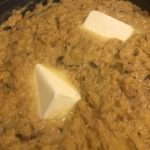
2) Fat! Coconut milk has notably more fat than cow’s milk, and while the lentils were still tasty on their own, stirring in a stick of butter towards the end of the cooking time gave them that lusciousness that has you coming back for seconds and thirds. 

I’ve heard that the latter is actually a common restaurant technique when making sauces (maybe a French thing?), to stir in a stick of butter towards the end. I don’t indulge in that normally, and honestly, I don’t even want my daily dinner food to be that rich.

But in this case, a stick of butter stirred into a big double batch of lentil curry, feeding 30 people, was the perfect addition.  Mmm…

#serendibkitchen

Halibut with Roasted Spicy Beets, Beet Green & Coconut Mallung, and a Dill-Citrus Gremolata

    I’ve been wanting to learn how to cook different kinds of fish, so tonight, I took on halibut. This seems like a fairly delicate fish, and many of the recipes I reviewed were very simple and lightly seasoned. Which is fine, but, y’know, Sri Lankans gotta bring a little heat, right?

So I took an pleasant-looking recipe on Epicurious, which made use of both beets and beet greens for a very pretty result, and started messing with it. Lime and lemon instead of orange, mostly to lead it in a Sri Lankan direction. A little green chili improved the beets, and a little lime juice improved the halibut.

The real excitement was taking the beet greens and using a mallung-style approach with coconut, lime juice, and sugar. So good! On roasting, the greens sitting under the fish soaked up lots of flavor, and the greens on the edge got delightfully crispy. I could’ve made a meal out of beet greens alone, which is not something I say every day! But they were delicious with the halibut and the roasted beets.

If you wanted to make it just a little more South Asian, I think you could add a t. of cumin powder to the halibut, and/or 1-2 T of coriander seeds and maybe a few T of yogurt to the beets. I’ll be trying that next time!

Ingredients:
5 tablespoons olive oil, divided

Gremolata:
1/4 cup chopped fresh dill
1 tablespoon finely grated lime peel + 1 tablespoon finely grated lemon peel

Beets:
3 medium (1 1/2- to 2-inch) beets with green tops attached; beets trimmed and scrubbed
1/2 cup thinly sliced shallots
1-3 green chilies, chopped fine (optional)

Beet greens mallung:
Beet greens very coarsely chopped (about 4 cups, ideally)
1/2 c. grated dried coconut (unsweetened)
1 t. lime juice
1/2 t. sugar
1/2 t. salt
1/4 t. pepper

Halibut:
4 6- to 7-ounce halibut fillets or mahi-mahi fillets (about 1 inch thick)
2 T lime juice
more salt and black pepper to grate over

1. Preheat oven to 450°F. Cover large rimmed baking sheet in foil and brush with 1 tablespoon oil. Mix chopped dill and grated peel in small bowl for gremolata.

2. Peel beets and slice into 1/4 to 1/3 inch thick slices; put in medium glass bowl; add enough water to cover beets halfway. Cover loosely with plastic wrap and microwave on high until just tender, 4-5 minutes. Uncover and drain. Return beets to same bowl, and add 1 tablespoon oil, 1 tablespoon gremolata, sliced shallots, and green chilies.  Sprinkle with salt and pepper; toss well.

3. Toss chopped beet greens in another medium bowl with 1 tablespoon oil, lime juice, sugar, salt, and pepper.

4. Spread beet slices in single layer on half of prepared baking sheet. Mound beet greens on other half of baking sheet.

5. Sprinkle fish with salt and pepper; place fish fillets on top of beet greens and pour remaining lime juice over fish. Brush fish with remaining 2 tablespoons oil. Sprinkle fish with 2 tablespoons gremolata.

6. Roast fish and vegetables until fish is just opaque in center, about 10-12 minutes.

7. Divide fish and vegetables among plates. Sprinkle with remaining gremolata and serve.

Ginger-Garlic Chicken

(30-90 minutes, serves 6-8)

The timing on this is so variable because you can either do it the long way described below, the way my mother recommends, which is definitely a bit tastier — or you can do a much faster version, where you mix the spices with the chicken, skip the marinating, and then just sauté the chicken in the pan on medium-high until cooked through and serve. I use both methods, mostly depending on how much of a hurry I’m in. Regardless of which method you use, this dish is best served fresh; if it sits, the chicken will tend to dry up and not be as tasty.

NOTE: This is my daughter’s favorite chicken dish, and one she always greets with delight; she started eating it when she was about five, with no added chili powder. Over time, I’ve added a little more chili powder when feeding it to both kids, serving with milk to help them along; you can also use black pepper if you’d prefer.

1 heaping tsp ginger powder
1 heaping tsp garlic powder
1 heaping tsp turmeric
1 tsp salt
12 chicken thighs, about 2 lbs., deboned and cut bite-size
vegetable oil for frying
1/2 to 2 heaping tsp red chili powder (to taste, optional)

1. Mix first four spices in a large bowl; add chicken pieces and rub with your hands until well coated. Marinate 1/2 hour

2. Heat oil on high; add chili powder (if using) and cook 15 seconds, stirring.

3. Add chicken and sear on high, turning to brown all sides.

4. Reduce heat to low and cover; cook approximately 15-20 minutes, until meat is cooked through.

5. Uncover and cook until all the liquid is gone.

6. Tilt pan and push chicken pieces to one side; allow excess oil to drain to one side for 5 minutes. Remove chicken to dish and serve hot.


NOTE: If reheating a day or two later, I recommend reheating in a pan with a little coconut milk; just simmer 5-10 minutes, enough for the milk to thicken with the spices into a nice sauce. Or serve dry chicken with a nice coconut-milky vegetable curry, like carrot or beetroot curry.

Instant Pot Sri Lankan Lamb Curry in Coconut Milk

(1 hr, serves 8)

Cooking lamb curry in the instant pot is only a little faster than cooking this on the stovetop, but does mean that you can make it in advance, or go run an errand (or attend a board meeting, in my case), and let it keep warm until you’re ready to devour the dish.

3 TBL vegetable oil
3 medium onions, chopped
2 TBL ginger, chopped fine
6-8 garlic cloves, smashed
1 tsp black mustard seed
1 tsp cumin seed
3 cardamom pods
3 cloves
1 stick cinnamon
6-12 curry leaves (optional)
1-2 TBL raw red chili powder
1 TBL Sri Lankan curry powder
1 1/2 tsp salt
3 lbs leg of lamb, cubed, about 1 inch pieces, with some fat left on

1/2 c. ketchup
1 can coconut milk
1-2 TBL lime juice

1. In the Instant Pot, heat oil and sauté onions with ginger, garlic, mustard seed, cumin seed, cardamom pods, cloves, cinnamon and curry leaves until onions are golden/translucent (not brown), stirring as needed.

2. Add chili powder, curry powder, and salt, stirring to combine, then add lamb and sear, stirring occasionally, for a few minutes, to bring out the flavor of the meat.

3. Add ketchup and coconut milk, stir well, scraping up any bits stuck to the bottom.

4. Set to pressure cook for 15 minutes; allow pressure to release before opening. Add lime juice and salt to taste, simmering if needed to reduce liquid.

5. Serve hot, with rice or bread.

Instant Pot Black Pork Curry / Uru Mas or Padre Kari


 (1 hour, serves 6-8)

Cooking this in the Instant Pot only saves about 30 minutes off the traditional recipe, but it does make it easy to set it going, and then wander off, knowing it’ll be kept nice and warm for you until you get back. When I made this test batch, I was able to take Anand to his swim lesson after I set the pressure-cooking going, knowing that it’d be all done and ready for me to eat when we got back!

This traditional tangy, peppery dish gets its dark color from the combination of dark roasted curry powder, tamarind paste, and lots of black pepper. (The colloquial name ‘padre kari’ refers to the black robes of a padre / priest.) Tamarind paste is fairly easy to find in Mexican and Indian markets, or you can order it online. It keeps well in the pantry for a long time, even after opening. Typically, you’d leave a good portion of the fat on the pork pieces; it soaks up a ton of flavor, and is truly delectable, balancing the meat, which can otherwise be a bit dry after long cooking. But you can trim all the fat off if you’d prefer.

3 medium onions, chopped
2 TBL ginger, chopped fine
6-8 garlic cloves, smashed
6-12 curry leaves (optional)
1 tsp black mustard seed
1 tsp cumin seed
3 TBL vegetable oil
1 TBL Sri Lankan curry powder
1 heaping tsp salt
4 tsp black peppercorns
3 lbs pork shoulder, cubed, about 1 inch pieces, with some fat left on
3 tsp tamarind paste
1/2cup white vinegar

1. In the Instant Pot, sauté onions, ginger, garlic, mustard seeds, cumin seeds, and curry leaves in oil until onions are golden/translucent (not brown), stirring as needed.

2. Add curry powder, salt, and peppercorns, stirring to combine, then add pork and sear, stirring occasionally, for a few minutes, to bring out the flavor of the meat.

3. Add tamarind paste and white vinegar; stir well.

4. Set to pressure cook for 30 minutes; allow pressure to release before opening. Serve hot, with rice or bread.

Instant Pot Beef Smoore

   Instant Pot Sri Lankan Beef Smoore
 
This dish translated really easily to the Instant Pot — I hardly had to modify it at all. And it’s simple enough that even a novice cook shouldn’t find it too intimidating. It normally takes 4-6 hours by the traditional method, but this was just an hour, start to finish. Maybe add another 10-15 minutes if you’re slow at chopping onions, but still — v. speedy, and I didn’t notice any lessening of flavor from the traditional version.
 
Beef Smoore / Mas Ismoru
(1 hour, serves 8)
This is a dish of Dutch / Sri Lankan origin. Yummy with rice — also great in weekday lunch sandwiches on hearty Italian bread, or shredded into a pita or folded naan, with some pickled onions and a little yogurt. Long-handled metal tongs will help with moving the large piece of hot meat. This is made to authentic Sri Lankan spice levels; reduce chili powder for a milder version. Delicious with a deep red wine; garnish with cilantro if desired. A fabulous dinner party dish.
 
3-4 lb chuck roast
3 TBL ghee or vegetable oil
1 TBL salt
1 TBL pepper
1/2 cup vinegar
1 TBL tamarind, dissolved in one cup water
2 medium onions, finely chopped
6 cloves garlic, finely chopped
1 TBL finely chopped fresh ginger
1 stick cinnamon
2 stalks curry leaves
1 stalk lemongrass, chopped
2 TBL Sri Lankan curry powder
2 tsp chili powder
1 tsp turmeric
1/2 tsp fenugreek seeds
1 tsp salt
1 cup coconut milk
1. Set Instant Pot on sauté and heat oil. Rub beef with salt and pepper, then sear the beef until lightly brown on all sides, which adds great depth of flavor to the sauce.
 
2. Add the vinegar, tamarind water, onions, garlic, ginger, cinnamon, curry leaves, lemongrass, curry powder, chili powder, turmeric, fenugreek, remaining salt, and coconut milk. Stir to combine, scraping up any browned meat on the bottom of the pan.
 
4. Cover the Instant Pot and set to pressure cook for 45 minutes. When finished, release steam and then remove lid.
 
5. Remove meat to a serving dish; if the gravy is too thin, reduce it by boiling rapidly uncovered. Transfer gravy to a serving bowl. Slice the meat into the desired thickness, and pour gravy over the slices; serve hot with rice or bread.