 I’d deem these barely acceptable. They taste right, if a bit dense and chewy, and they toast up. The biggest problem with them is that they’re quite sticky, so a huge pain to cut up into neat squares. Your best bet with them would be to abandon neatness, chop off pieces, and then toast them up over a fire, where you don’t care so much about the neat aspect. They brown beautifully, melt in your mouth afterwards, and I’m sure would be delectable in a s’more.
NOTE: The egg whites won’t be cooked, so you may want to use pasteurized egg whites for food safety.
NOTE 2: Recommend not trying to make these on a high-humidity or raining day, as the moisture in the air will affect setting properties.
(45 minutes + cooling time & 15 minutes powdering time, makes 36)
4 egg whites, divided
2 t. powdered agar-agar
1 1/2 c. granulated sugar
1 c. light corn syrup
1/4 t. salt
1/2 c. water
powdered (confectioner’s) sugar
butter (for greasing the pan)
food coloring (optional)
chocolate chips (optional)
sprinkles (optional)
1. Place two egg whites in bowl of stand mixer (whisk attachment); add agar-agar. Stir briefly to combine.
2. In a small saucepan (a bigger one will be heavy and hard to hold steadily at a later stage) combine water, granulated sugar, corn syrup, and salt. Cover and cook over medium high heat for 4 minutes. Uncover and cook until the mixture reaches soft ball stage (240 degrees if you have a candy thermometer), approximately 12 minutes. Once the mixture reaches this temperature, immediately remove from heat; if it continues, it will swiftly turn into hard candy.
3. Turn mixer on low speed and, while running, slowly pour the sugar syrup down the side of the bowl into the gelatin mixture. (Be very careful with the sugar syrup, as it is scaldingly hot and will burn you badly if it gets on your skin.) Once you’ve added all of the syrup, increase the speed to high.
4. Continue to whip until the mixture becomes very thick and is lukewarm, approximately 12 minutes. Add food coloring, if using for the whole batch, during this stage. (For bicolor marshmallows, you can pour half out, spreading flat. Then color remainder in mixer bowl and whip to mix, then pour out second half on top.). Add two more egg whites and whip another 3-4 minutes; volume should increase.
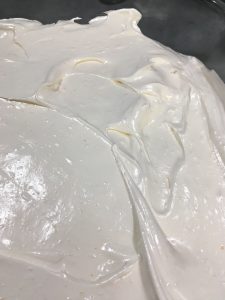
5. While it’s whipping, butter a large 9 x 12 pan and dust with powdered sugar (you don’t need the sugar here for gelatin marshmallows, but the agar ones are stickier). Prepare an oiled spatula.
6. Pour the mixture into the prepared pan, spreading it evenly (and swiftly) with oiled spatula.
7. Dust the top with enough of the powdered sugar to lightly cover. Reserve the rest for later. Allow the marshmallows to sit uncovered for at least 4 hours and up to overnight.
8. Turn the marshmallows out onto a cutting board and cut. As you’re cutting, lightly dust all sides of each marshmallow with the remaining powdered sugar, using additional if necessary. These are more perishable than gelatin marshmallows, due to the egg whites, so best used within a few days.


 (5 minutes, serves 2-4)
 Rich passionfruit flavor and a hint of rose scent. This delicate cake is lovely with a very light tea. Passionfruit puree can be ordered online, or is often found in Mexican grocers, sometimes frozen. If you have are lucky enough to have actual passionfruit on hand, you can, of course, pulp and puree them yourself; strain out the hard seeds if you do.

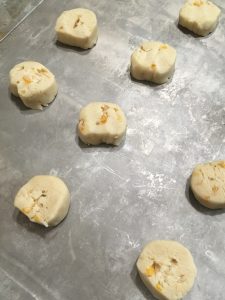
 Mango-Ginger Shortbread
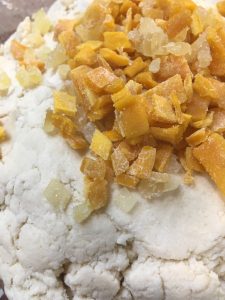
 Experimenting with yesterday’s Sri Lankan spiced swordfish. Made a quick drizzle (1 T yogurt, 1 T lime juice, 1 t. honey), cooked some healthy Sri Lankan red rice (similar to brown rice, with a lovely nutty flavor), and stirred in some salted, roasted cashews, dried cranberries (sultanas would be more traditional, but I love the added tang from the cranberry), and fresh summer cherry tomatoes.
 Launch day! The Marshmallows of Serendib (and yes, the name was a deliberate echo of Arthur C. Clarke’s wonderful Fountains of Paradise) is now
  Delicate and fragrant, with a little nutty goodness to add to your morning or teatime. (If you don’t have a mini scone pan, you can cut and shape these by hand, and bake on a regular baking sheet, placing them quite close together. If you pop them in the freezer for 30 minute before baking, they’ll hold shape better.)


 This makes a delicious and cravable spoonable dessert (you might want to stir in some chopped fruit to grace it, or sprinkle with sliced almonds).