Sri Lankan Broccoli Varai

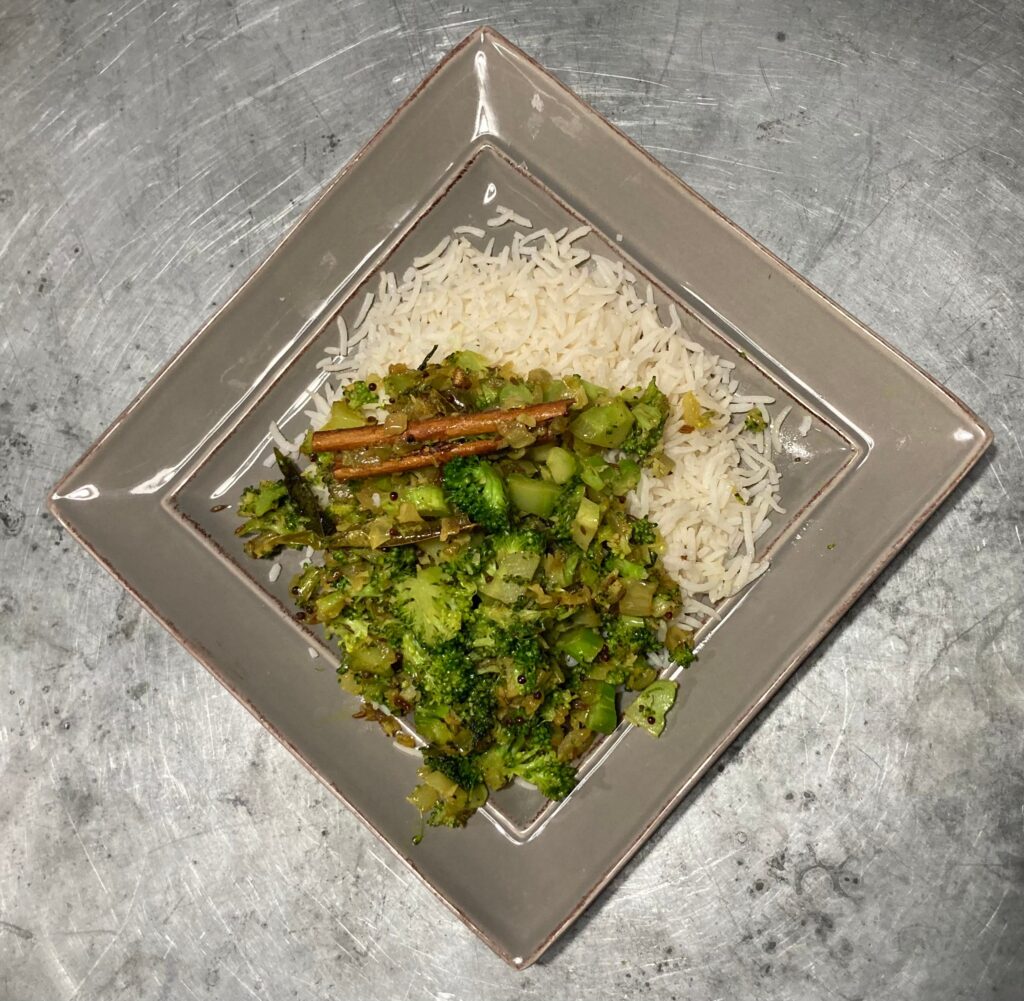
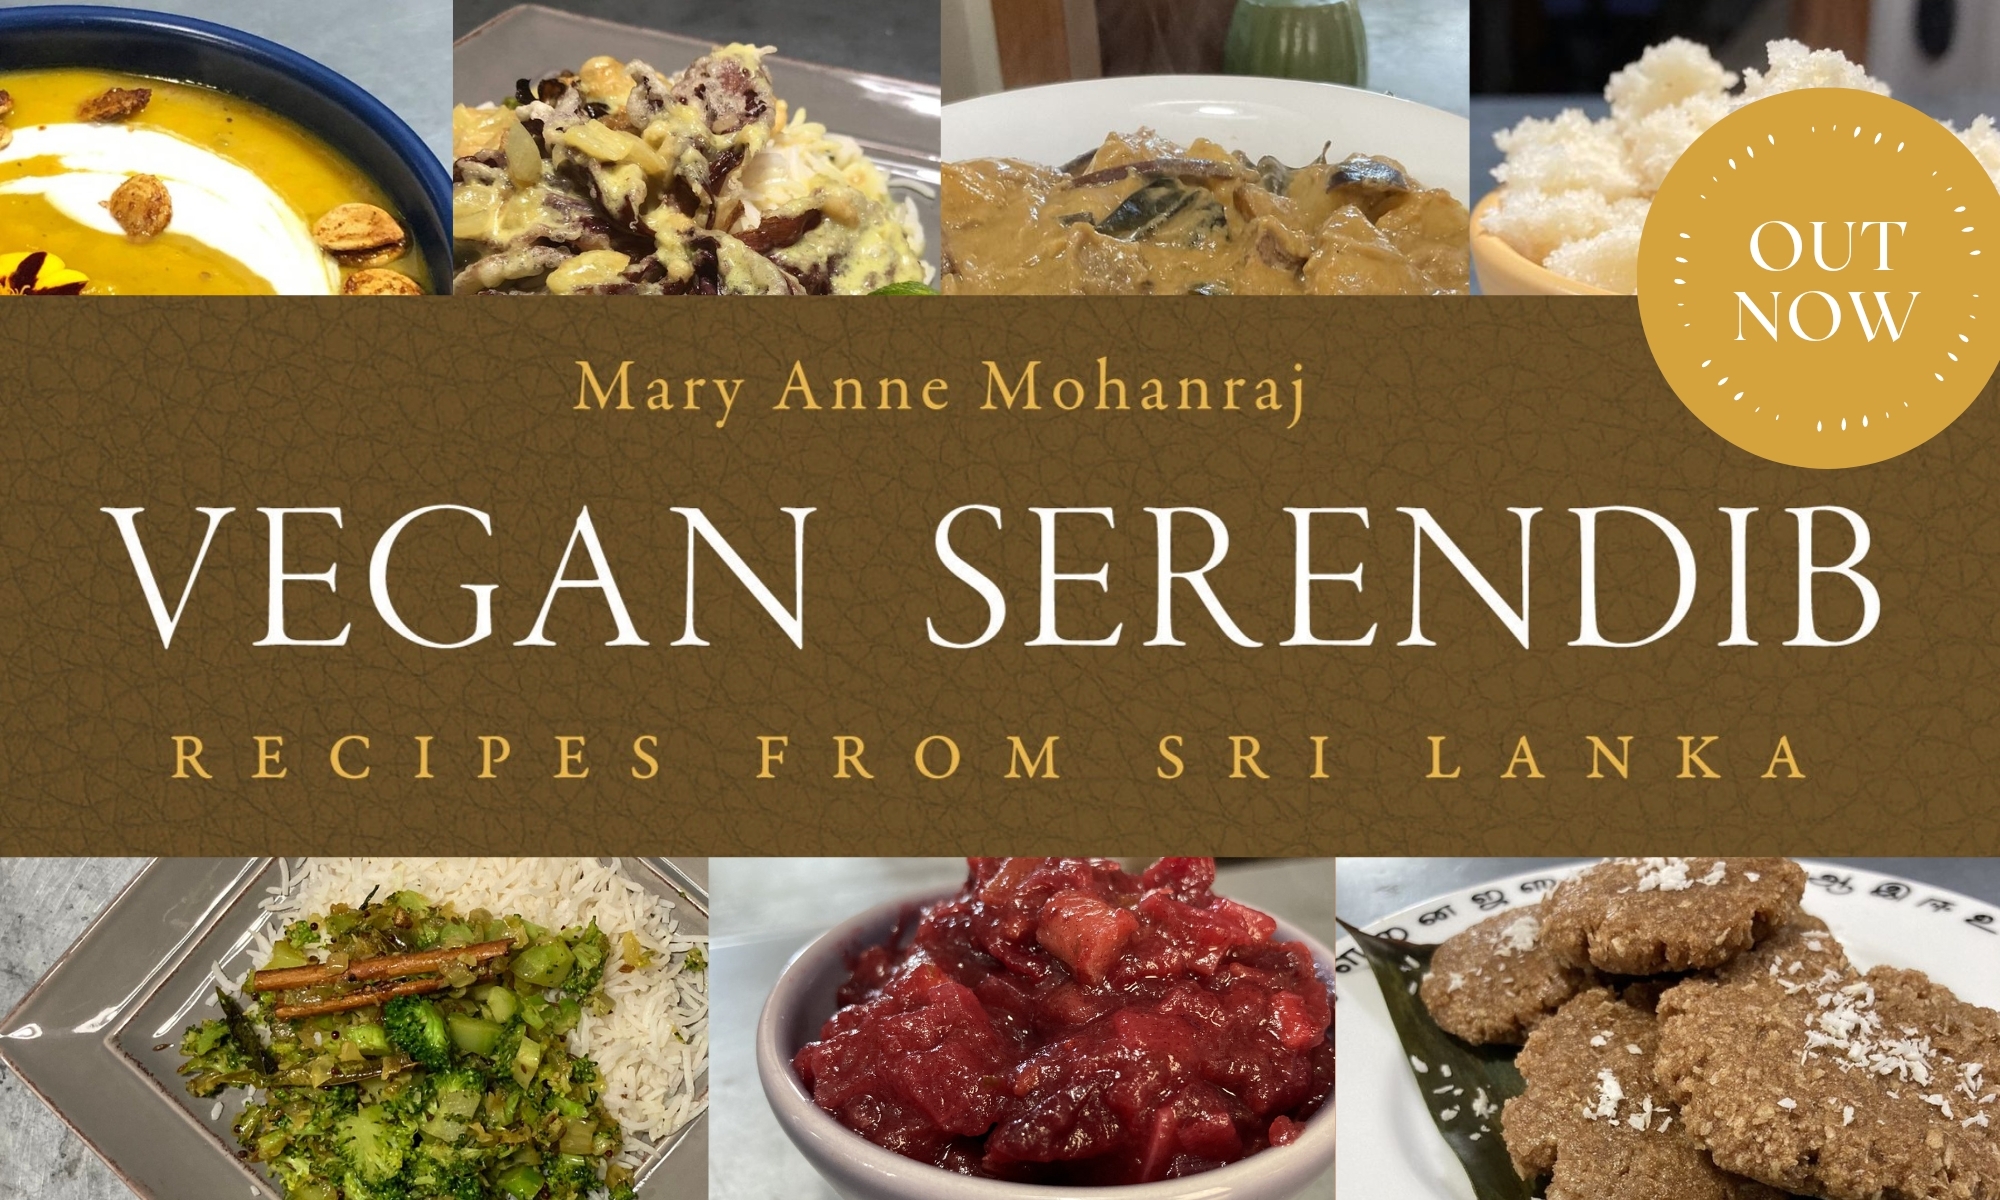
Needed a photo of broccoli varai for the vegan cookbook, so made it and devoured it for dinner last night. So good! As a bonus, Anand happily ate it too! Kavi likes the broccoli, but says she doesn’t like the little seeds, which I think might be a legacy of having worn braces for years; I might try cooking it with ground cumin & mustard for her next time. But I like it like this. 🙂

Sri Lankan Broccoli Varai

(30 minutes, serves 4)

A good way to get green vegetables into children.

Note: I keep this fairly mild, so my kids will eat it, but for a spicier (and more traditional) version, chop 2-3 green chilies, and stir them in during step 1.

1 pound broccoli (crowns and/or stalks), chopped fine (by hand or in food processor)
1 medium onion, chopped fine
1-2 Tbsp. vegetable oil
6-12 curry leaves
1 1-inch cinnamon stick
¼ tsp. black mustard seed
¼ tsp. cumin seed
1 tsp. black pepper (or cayenne)
1 tsp. salt
½ tsp. ground turmeric
½ cup shredded unsweetened coconut
2 Tbsp. oil (optional)
1 tsp. sugar (optional)

1-2 tsp. lime juice (optional)

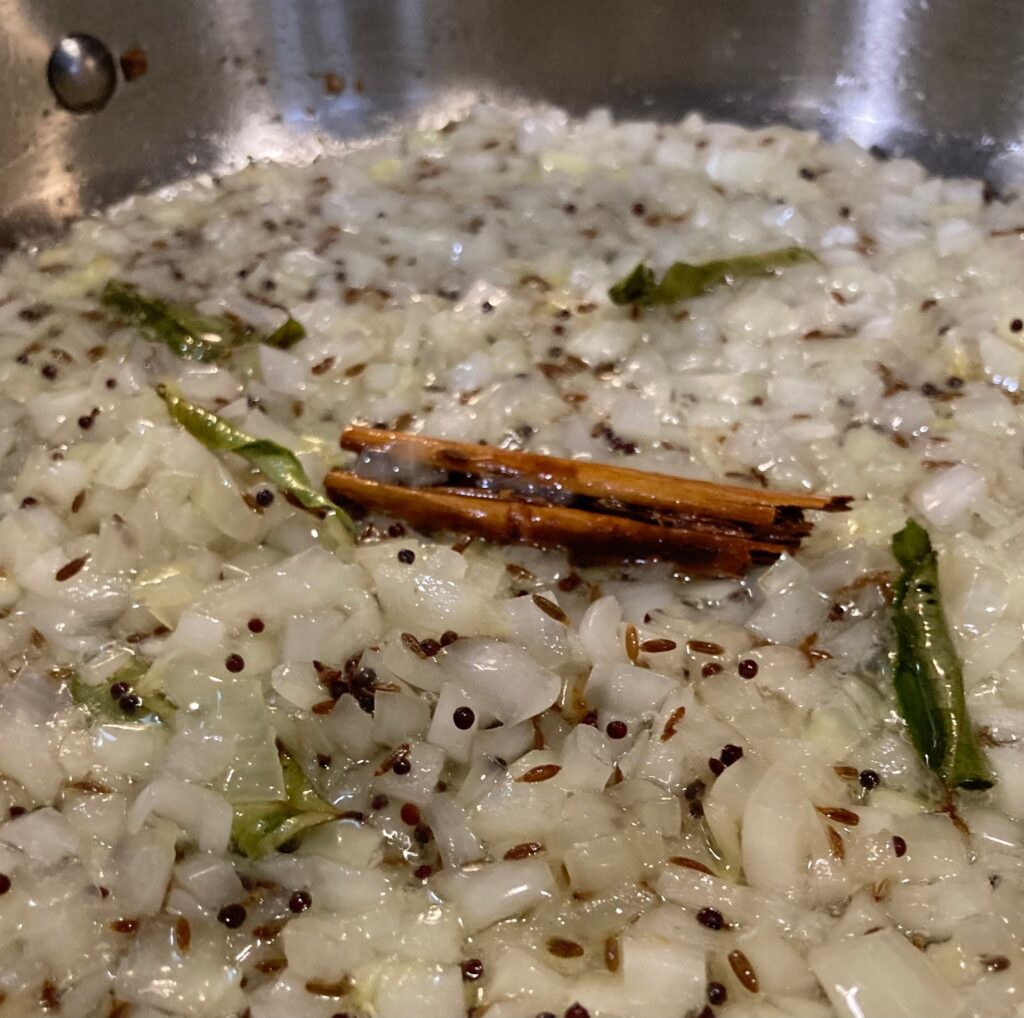
1. Sauté onions in oil on high with curry leaves, cinnamon, mustard seeds, and cumin seeds until onions are golden / translucent (not brown).

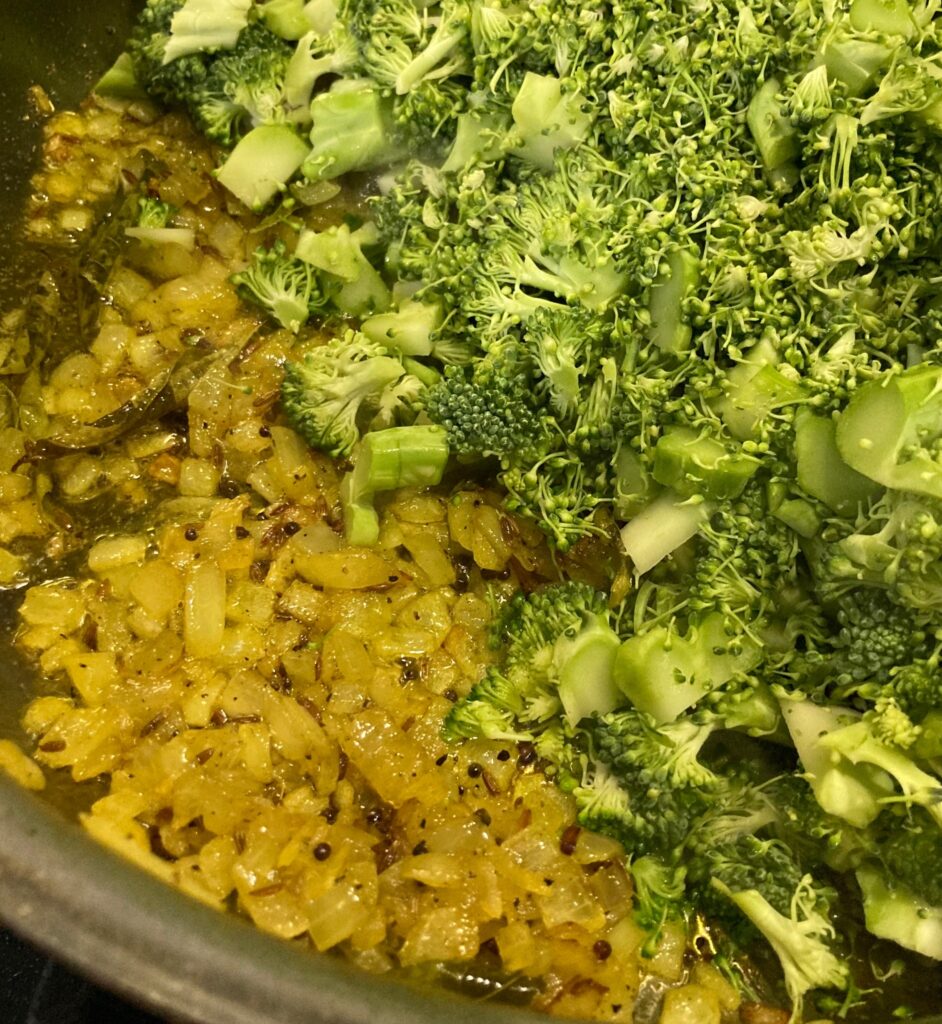
2. Add broccoli, salt, pepper, and turmeric; fry, stirring, for a few minutes. (If the broccoli starts sticking to the bottom of the pan, you can add a little water.)

3. Add in coconut and stir for five minutes.

4. Taste, and stir in sugar and/or lime juice if desired. Serve hot, with rice and curries.

“Artist’s Valentine”

“Artist’s Valentine” rose-cardamom iced cookies — decorated with a paintbrush! Two paintbrushes, actually, one for brushing on the pink, and a much smaller one for flicking in gold luster dust (with some gold sprinkles added after).

I’m not sure that I love this combo of techniques, actually — if I could go back in time, I think I’d do some of the cookies with just the pink brushwork, some with just the gold splatter, and maybe a few with both? But oh well, they’re still cute, and will be delicious regardless.

And one big plus for this decorating technique — it’s fast! I iced the cookies with white last night, which took about 20 minutes of dipping. Let them dry overnight, and then another 15-20 minutes of decorating this morning to finish them off.

If you’re doing the more elaborating outline + flooding technique for icing sugar cookies, it can take much, much longer. I’ve done it, but am not likely to do it again unless it’s for a very special occasion; I just don’t have the patience!

How Shall I Ice These?

Snowstorm predicted for tomorrow, quiet evening here. Father Brown murder mysteries on the TV, and cardamom-rose heart sugar cookies in the oven. Cool today, ice tomorrow. Now, how shall I ice these? So many options…

These are either for the Valentine’s party / sale coming up on the 12th (link in comments), or for the Patreon winter treat boxes (also link in comments), or possibly both…although the kids will undoubtedly get a few too. 🙂

Apple-Cheddar Scones

(45 minutes; makes 16 mini scones)

You can tell I was raised in New England, because apple + cheddar is one of my favorite combos. A hearty autumn/winter scone that’s ideal for breakfast or teatime. My kids love these.

1 large apple
2 c. flour
1 t. baking powder
3/4 t. salt
6 T cold butter, chopped
1 c. grated cheddar, divided
1/2 c. whole milk

2 eggs

1. Preheat oven to 375F. Peel, core, and cut apple into big chunks (about 16), roast on a foil-lined baking sheet for 20 minutes. Let cool.

2. While the apple chunks are cooling, mix the flour, baking powder, and salt into a mixing bowl.

3. Work in the butter with your fingers to make an uneven crumbly mixture. Stir in half the cheese.

4. In a separate bowl, combine beaten eggs and milk. Add wet mixture to dry, and stir to create a fairly wet dough.

5. Cut apple pieces into smaller dice, then work them into the dough, reasonably evenly.

6. Press dough into a molded scone pan (spray first with baking spray for easy release), or spoon onto parchment paper on a baking sheet for drop scones.

7. Top with the remaining cheese, and bake 20-25 minutes until cooked through, with the cheese nicely browned. Turn out onto a wire rack to cool. Serve warm or room temperature.

Starting to Schedule Zoom Cooking Classes

I’ve had some requests for Zoom cooking classes, so as we start thinking about promo events for Vegan Serendib, I’m going to start scheduling these. Questions:

a) We used some system for scheduling classes a few years ago, and I feel like it was sort of clunky and not ideal. What are people using for event-scheduling these days? Something that can smoothly accept credit cards, etc.

b) If I were teaching Sri Lankan cooking classes via Zoom, any particular recipes you’d like to request? I’m thinking the classes will be 1.5 hrs, $30, and you’d know the menu when signing up, and get a list of ingredients in advance, so you can shop and be ready to cook along.

Class would be recorded in my kitchen, Kevin probably not included. 🙂

Give a Girl a Knife

Recently finished reading _Give a Girl a Knife_. Interesting for women in the professional kitchen, for Minnesota cultural and food details, for the tension between city ambitions and country life, for homesteading practicalities. Enjoyed it.

This paragraph was one of my favorites, although possibly that’s because it’s freezing cold in Chicago right now too.

Stir-Fried Semolina / Uppuma

I had to retake some photos of uppuma for Vegan Serendib — the photo we used for Feast had a meat curry in the photo too, and we figured it’d be better to get a clean photo for Vegan. I did the super-fast version that I cooked weekly during grad school for these photos, but the full recipe is below.

Okay, now I’m hungry…

*****

Stir-Fried Semolina / Uppuma

(20 minutes, serves 4-6)

When I was harried in grad school, I made a very fast, very simple version of this often — five minutes to boil water, add semolina with some butter and salt, stir, and serve. Served with spicy egg and mackerel curry, it’s a wonderful breakfast or dinner; the soft uppuma blends beautifully with the fish — my ultimate comfort food.

This version, which is a little more time-consuming, offers more vegetables, more interesting seasonings, and a fluffier texture — it’s tasty on its own, or with a vegetable or meat curry. Both versions are great!

2 TBL butter
1 onion, chopped fine
3 dried red chili pods
1 tsp black mustard seed
1 tsp cumin seed
1 stalk curry leaves
1 rounded tsp salt
2 carrots chopped small
1/2 cup peas (or chopped green beans)
3 cups water

2 cups coarse semolina

1. Roast semolina in a dry pan over medium-high heat, stirring constantly for about five minutes, until it’s darkened slightly. This will give the end result a fluffier texture, with less clumping. Remove to a plate and set aside.

2. Sauté onions with seasonings in butter on medium-high for a few minutes.

3. Add carrots and continue to cook until carrots are softened and onions are golden-translucent. Add peas and cook a few minutes longer.

4. Add water; bring to a boil.

5. Turn down to a simmer and quickly pour in the semolina, stirring constantly, making sure all the wheat is moistened. Remove from heat and allow dish to sit for a few minutes before serving. Serve warm.

Note: You can use farina (sold as Cream o’Wheat) instead of semolina for an almost identical result. Semolina comes from durum wheat (high in protein, produces more gluten). Farina comes from any hard wheat but durum.

Making the Uppuma

More little cooking videos for Emmanuel to put on TikTok for me. 🙂 Making the uppuma…

(Ignore the loud clicking — our stove does that sometimes when we’ve just cleaned it and the burners are misaligned. I’m so used to it, I don’t even hear it sometimes.)