Vegan Milk Toffee Failed

Okay, so this attempt to make vegan milk toffee failed, and I’m not sure why. It’s actually my second failure — in the first, the pot turned into a caramelized black solid mass, and I am very grateful to Jed and Kevin for scrubbing it clean over the next few nights, because I was so frustrated I was ready to throw it away in despair. Considering it’s a not-cheap All-Clad pot, that would’ve been bad. They fixed it though.

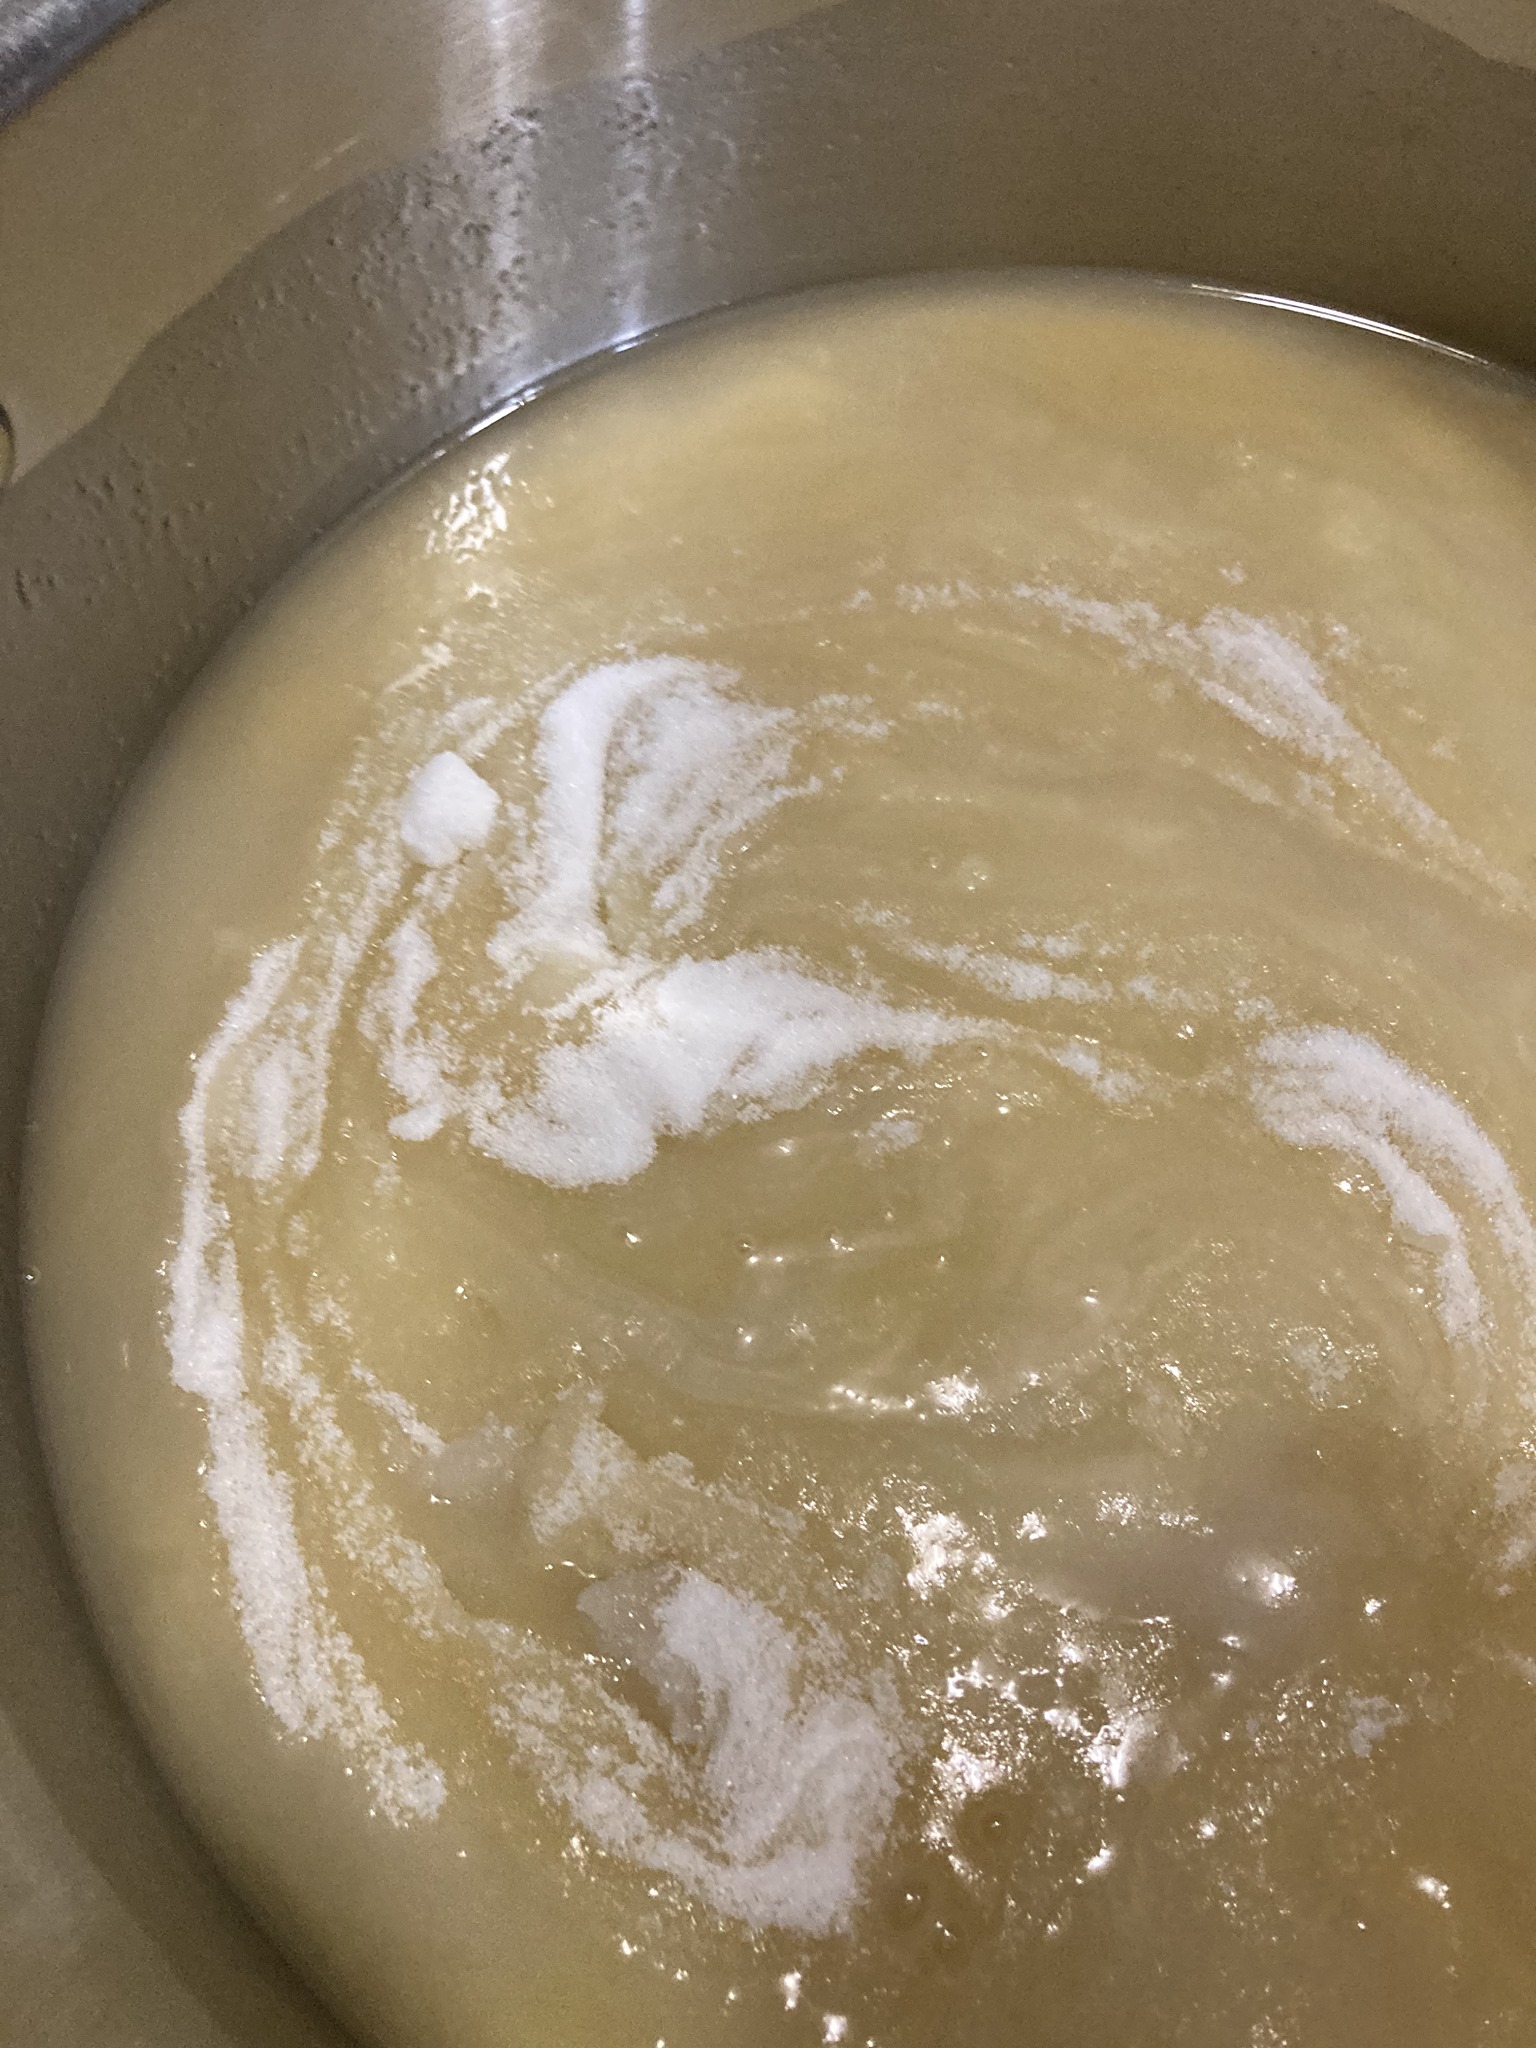
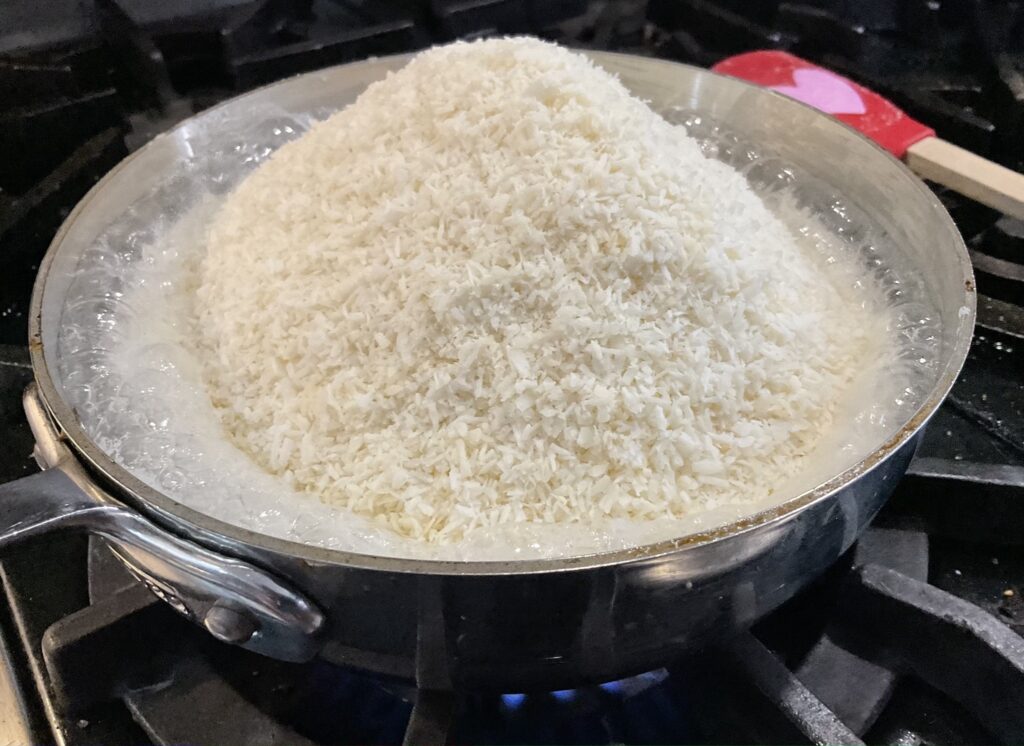
So, lesson one — condensed coconut milk heats up much faster than condensed milk, and you’d better stand right next to the stove and watch it, and also lower all the temps on your recipe (from medium-high to medium, from medium to medium-low, etc.).

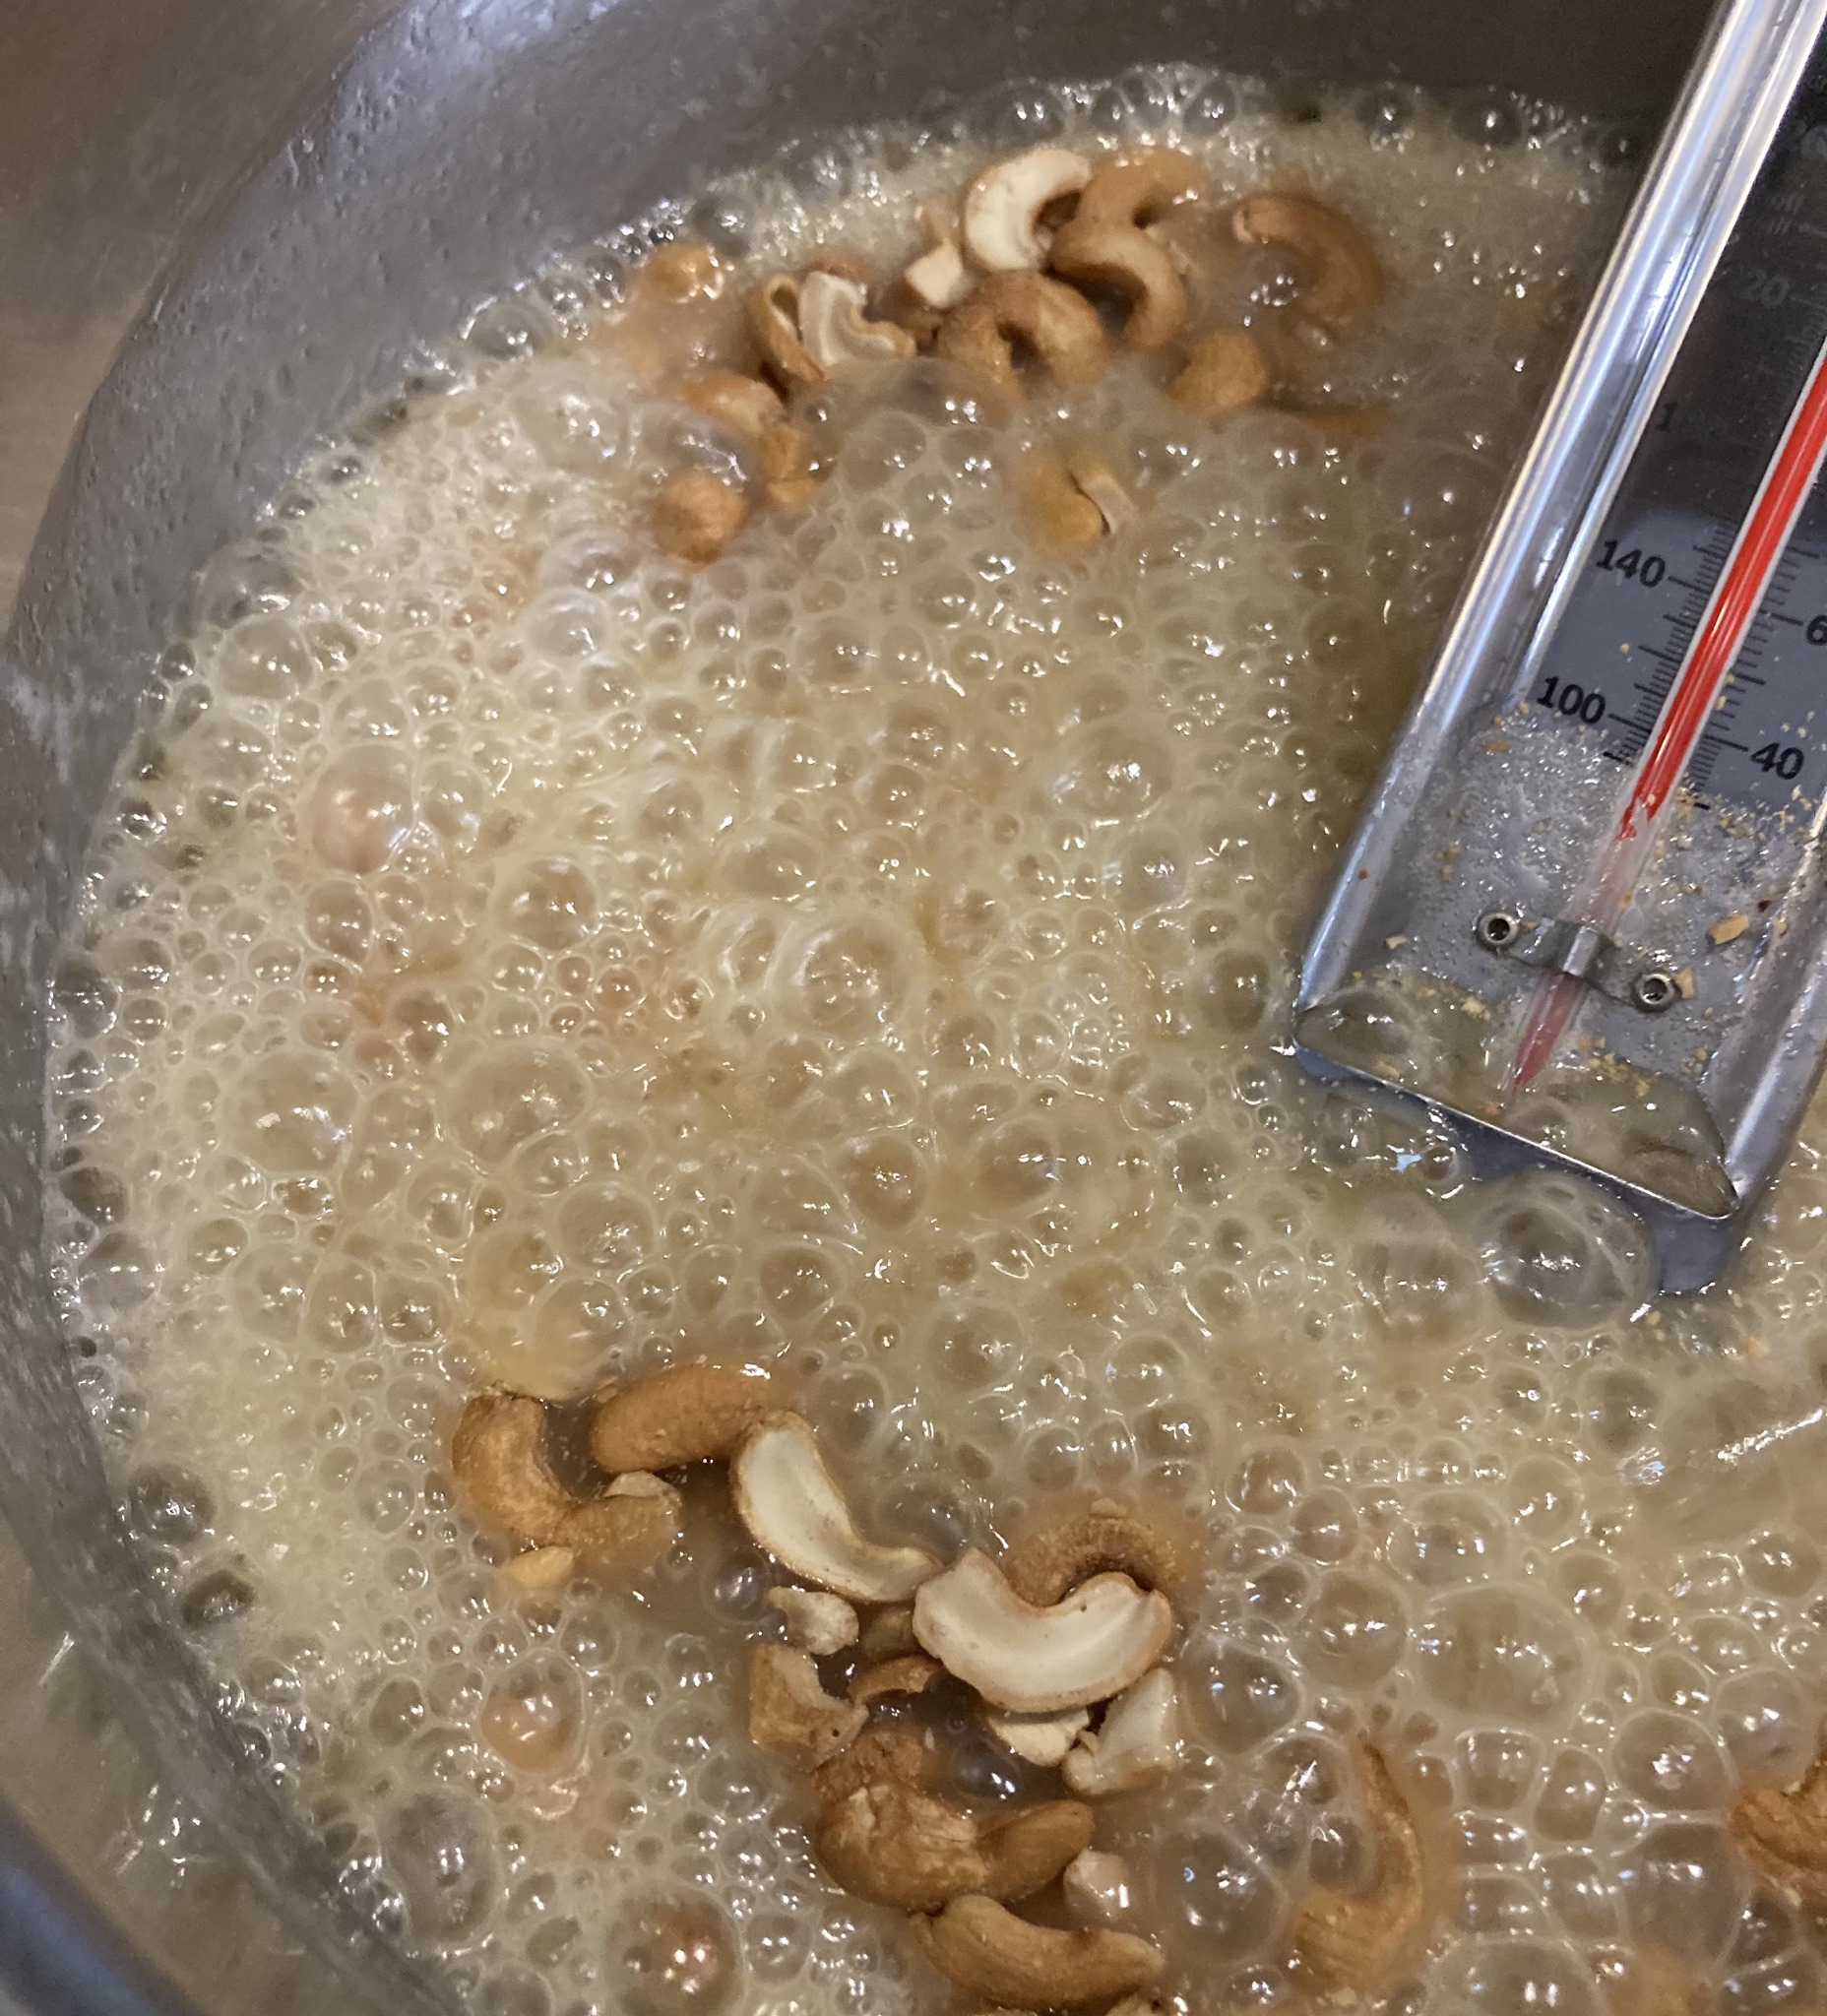
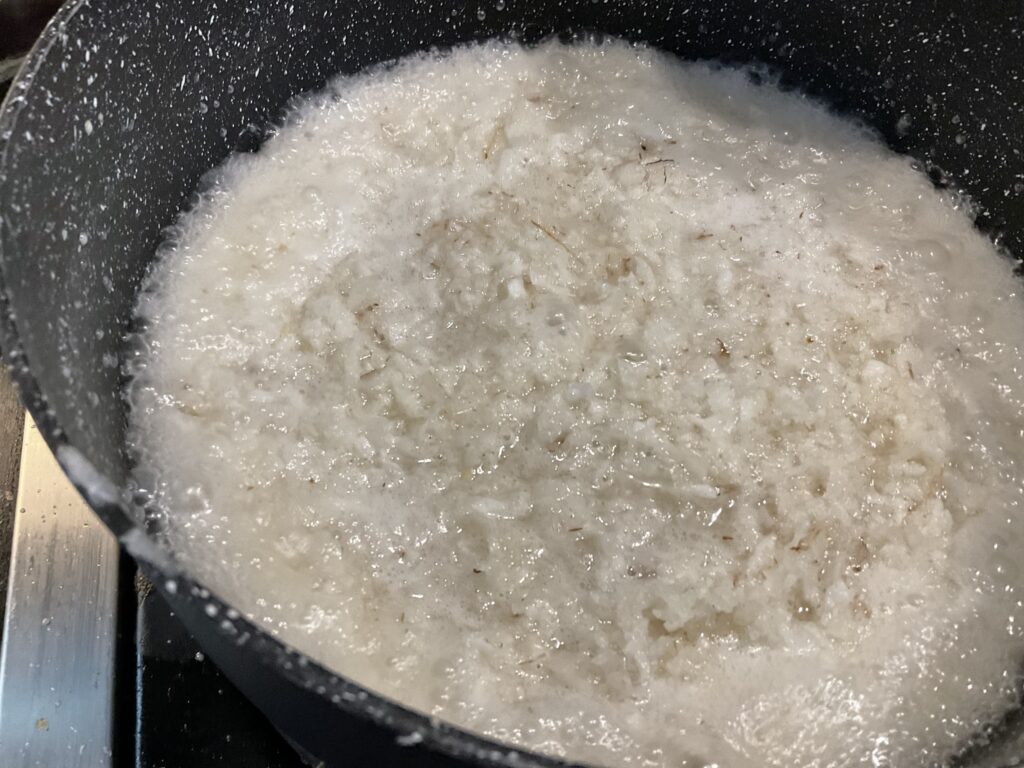
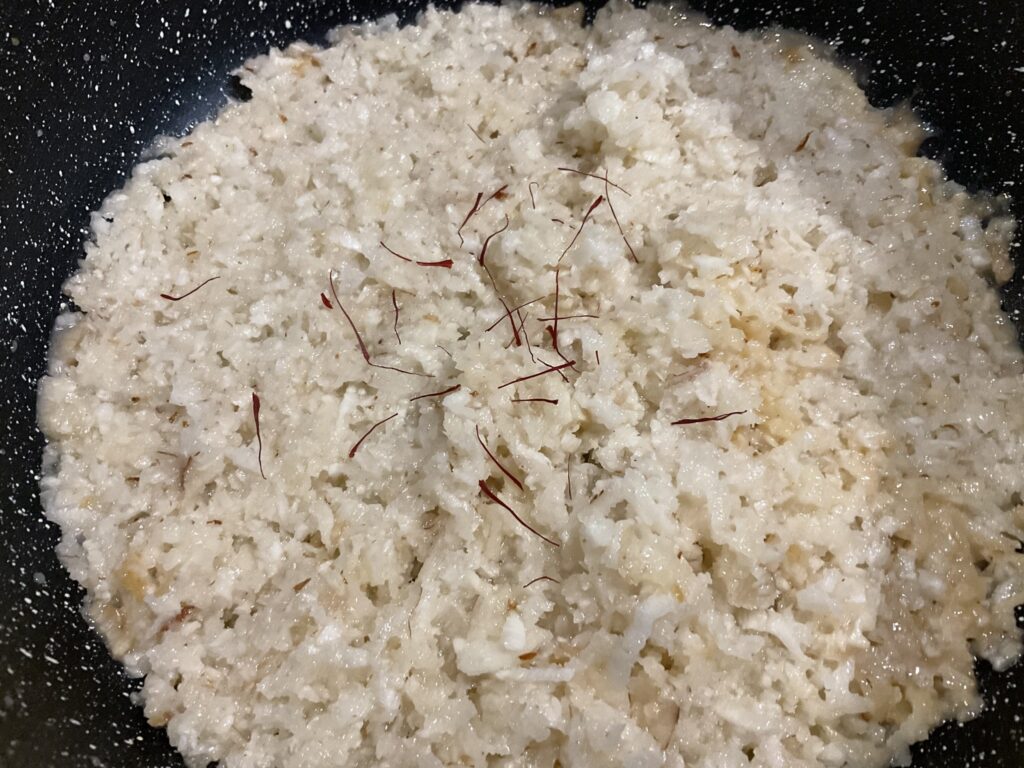
Second time through, I watched it like a hawk, and while it still went faster than regular milk toffee, it seemed to be mostly behaving. It got to the standard stages (first thread, then soft-ball), as confirmed by my candy thermometer.

I then made made another mistake — the last step is normally to add a stick of butter, and I did that without thinking because I have made milk toffee SO many times, and that made it not vegan, sigh, so I suppose I should try it again either with vegan butter or skipping that step entirely — a lot of recipes don’t call for adding butter, but my Aunty Marina who taught me how to make this recipe uses it, and I think it gives a nicer texture.

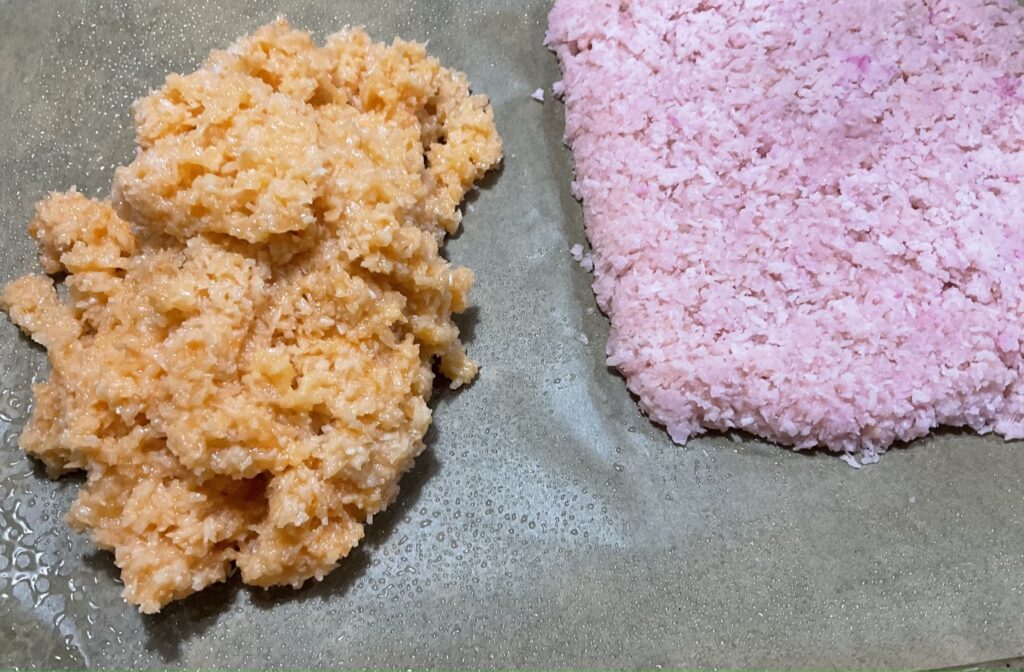
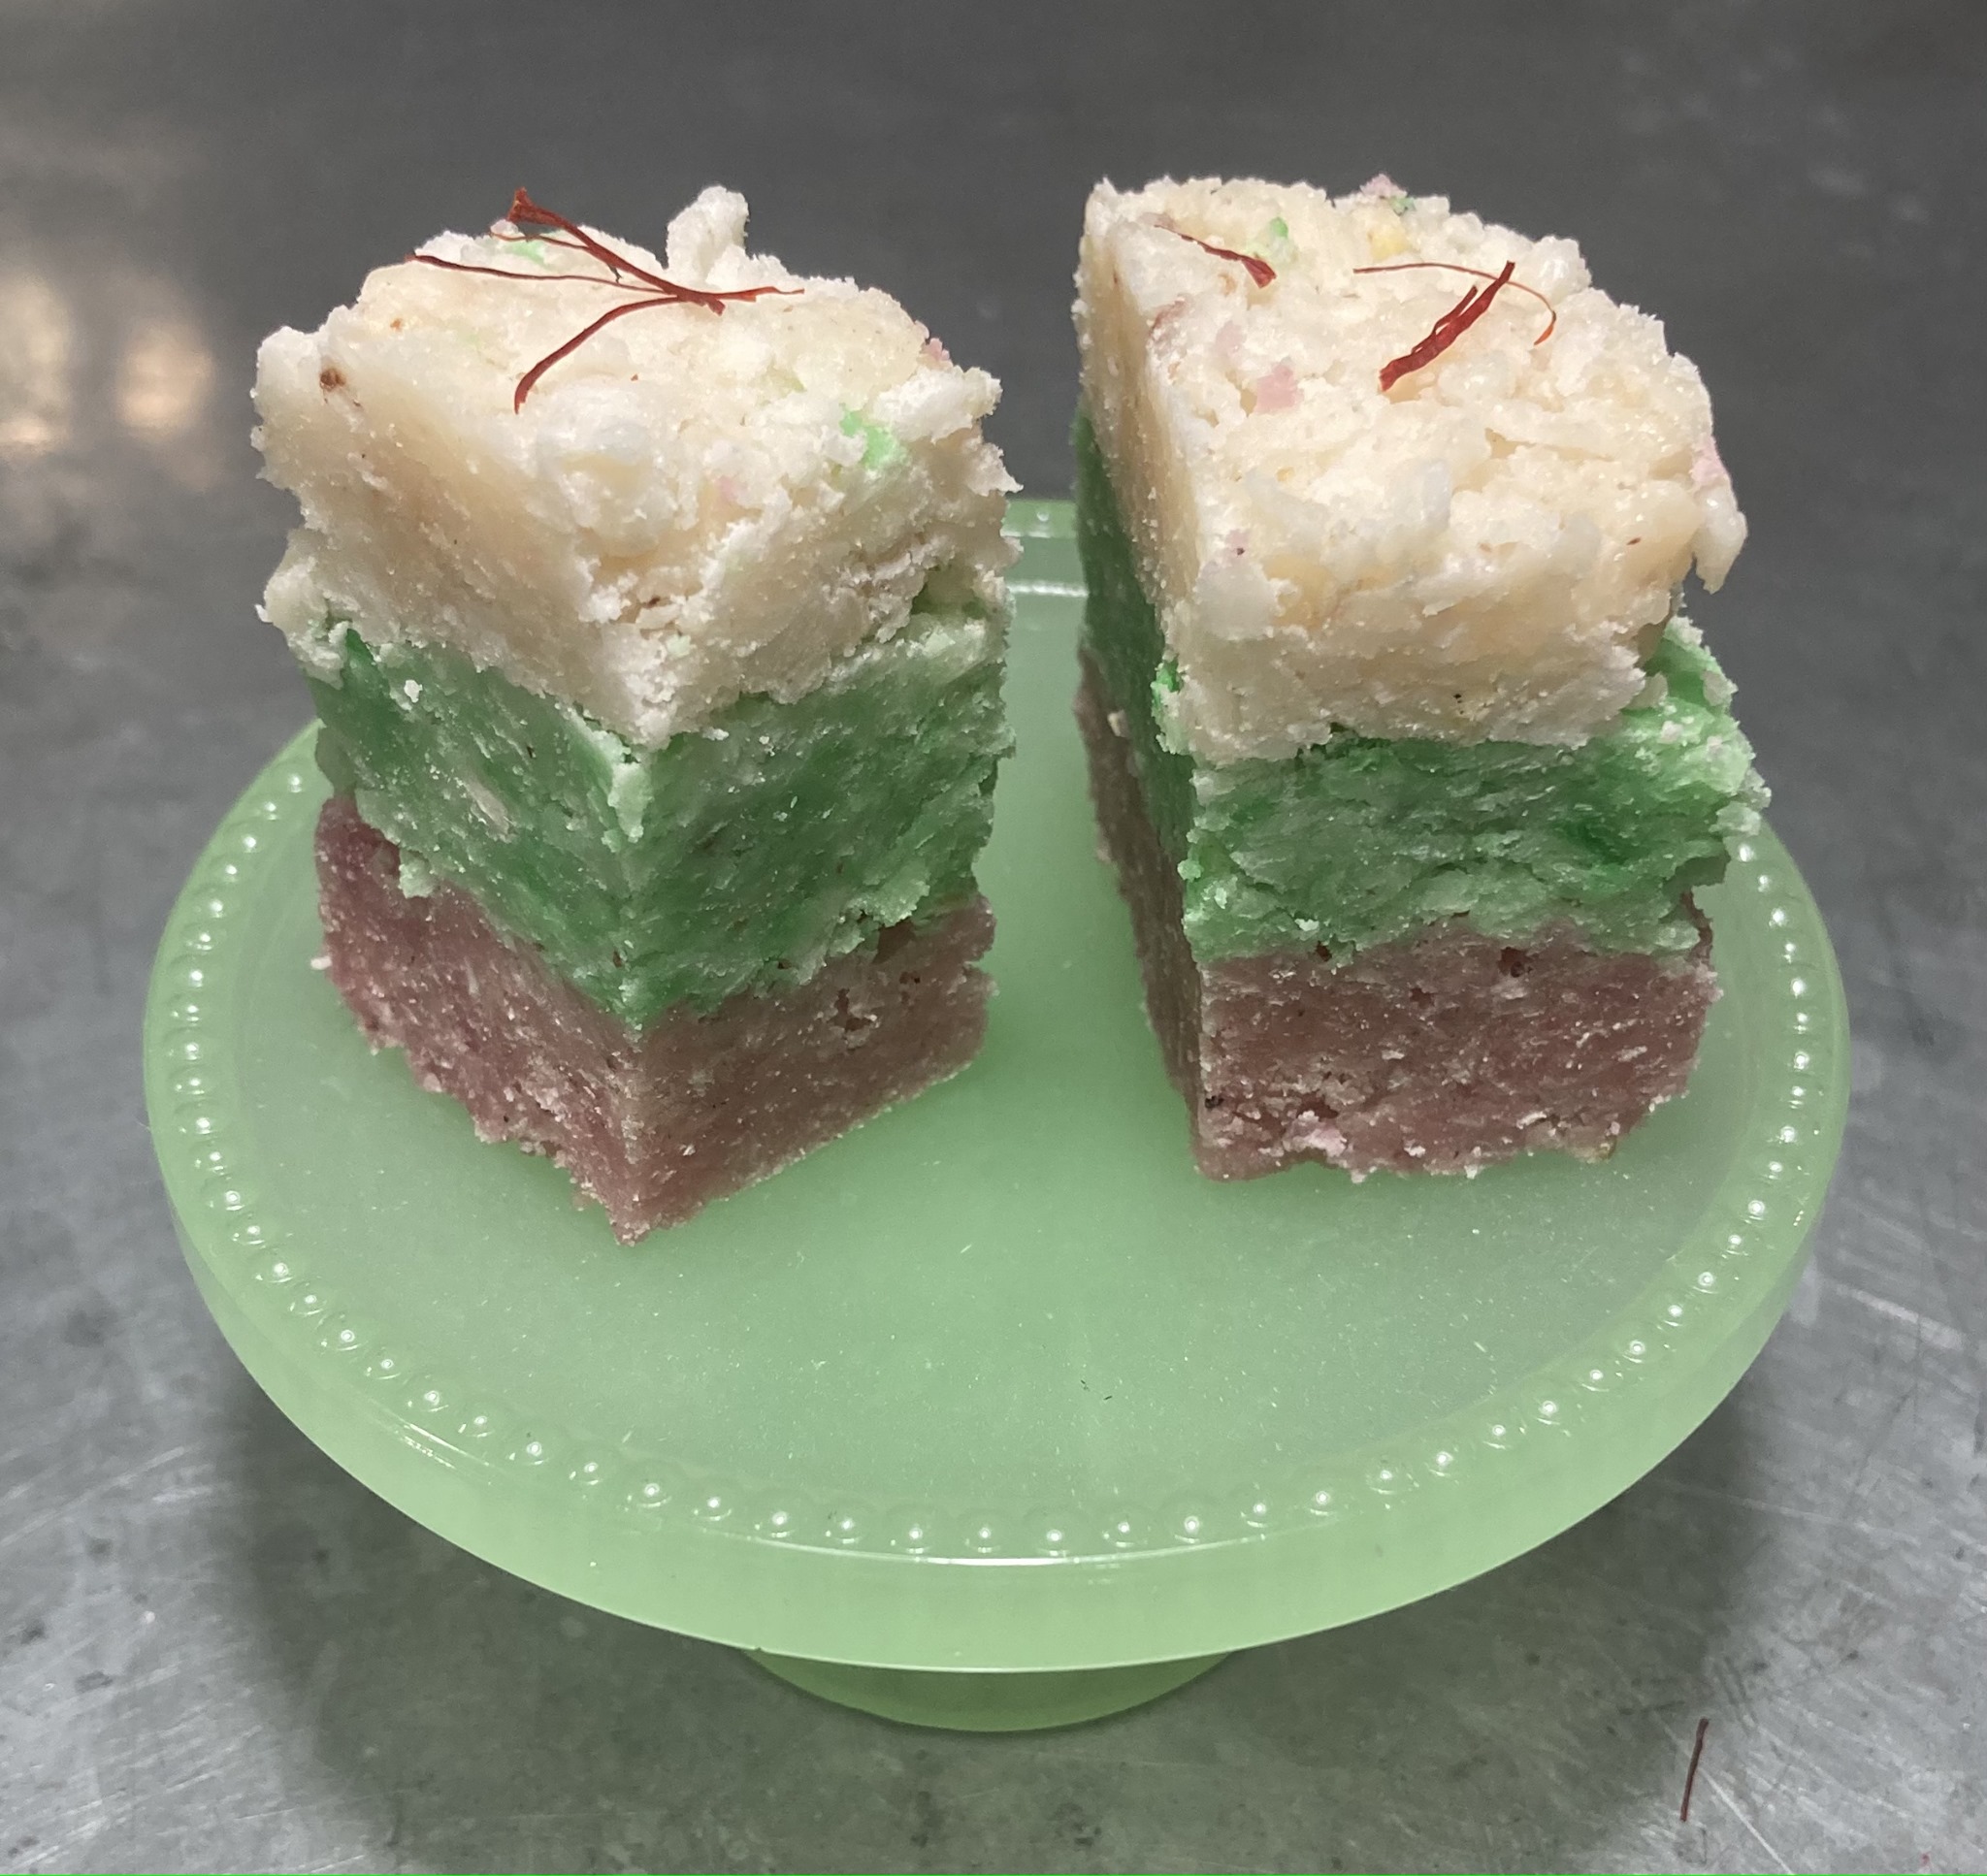
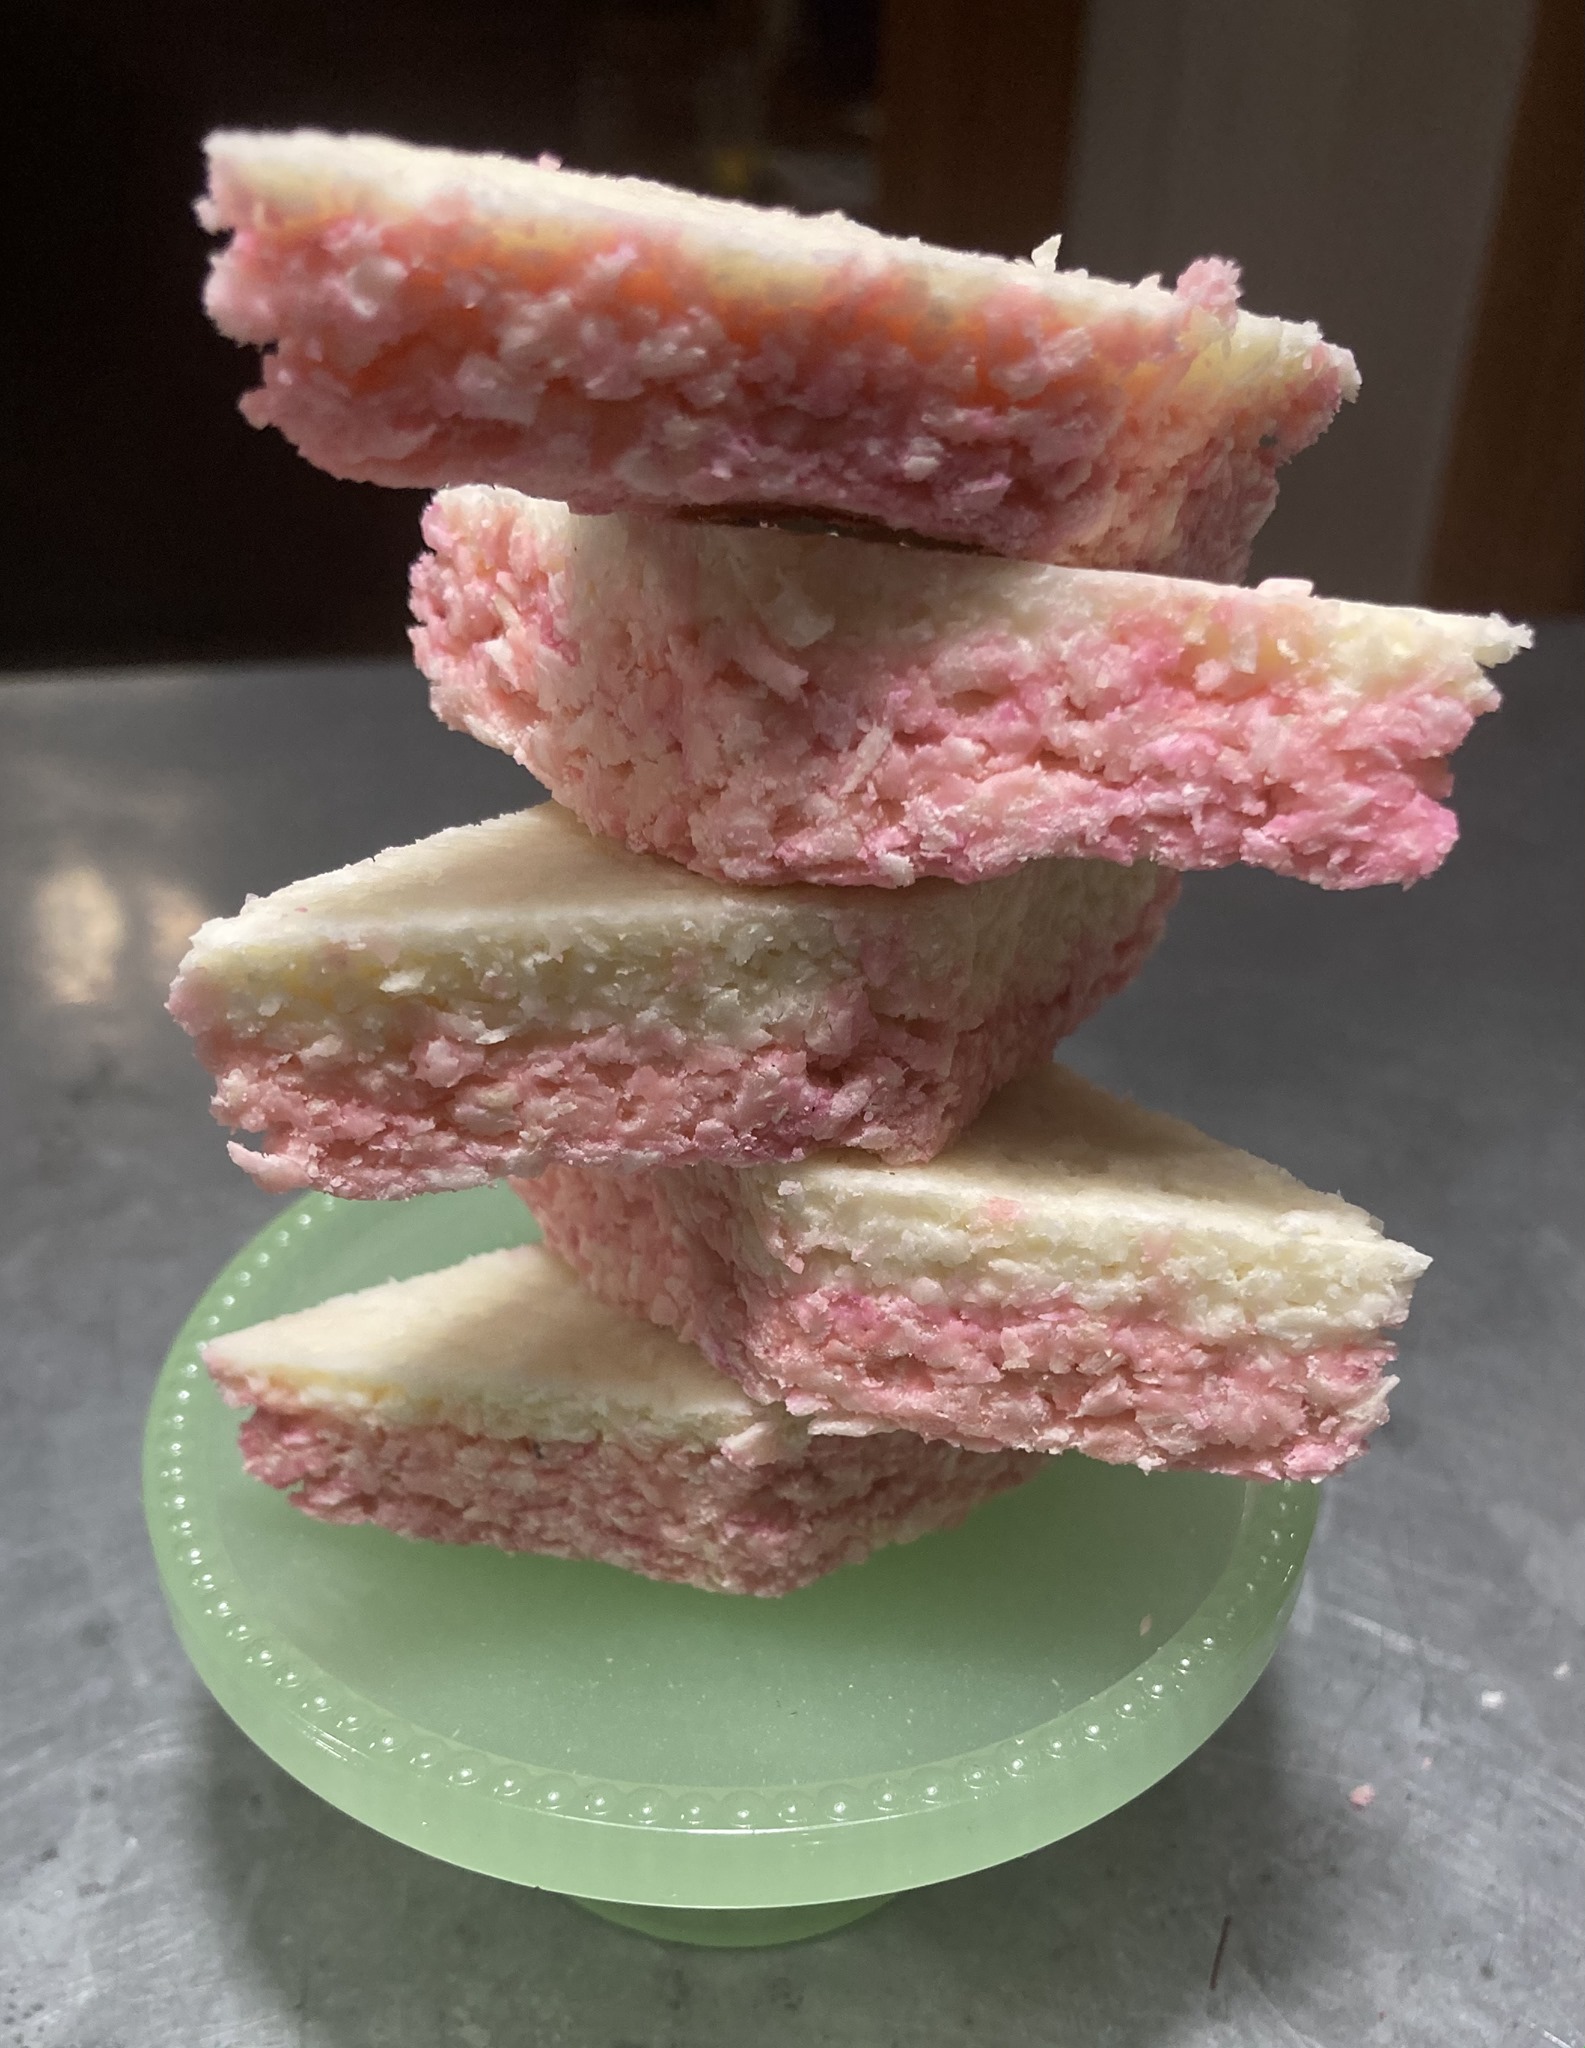
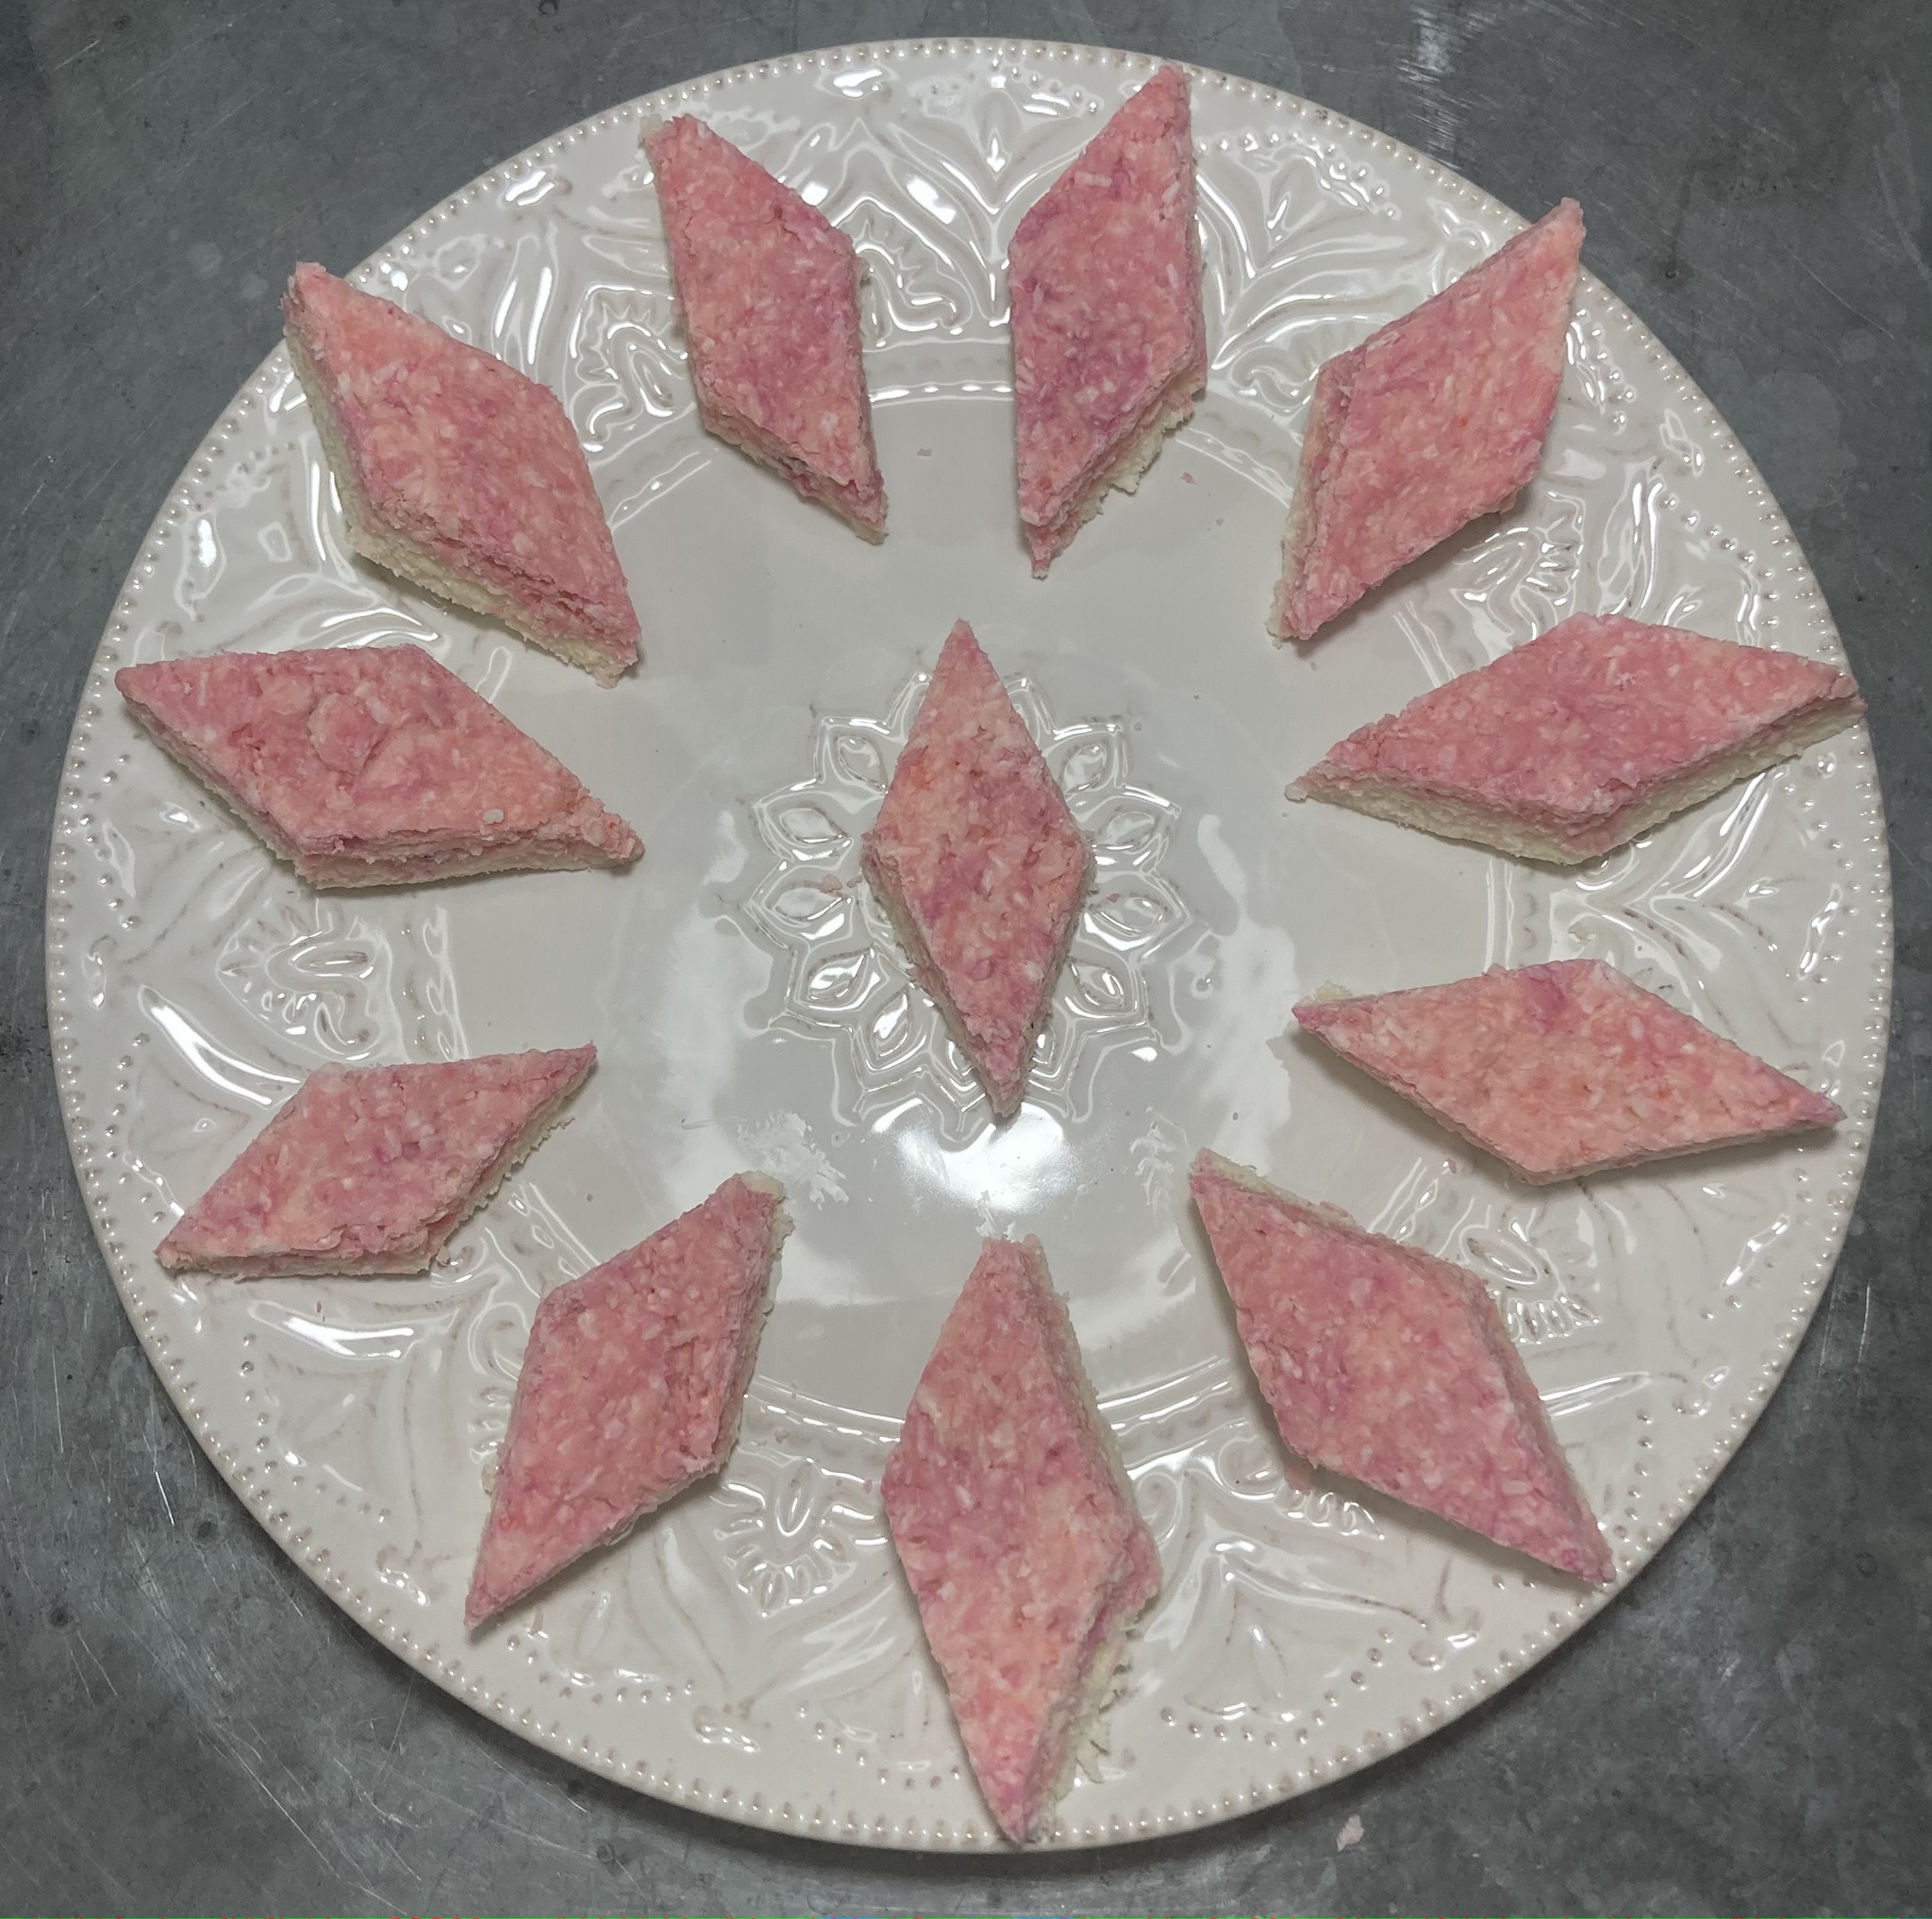
But before I re-do it (again), I’d like to know what went wrong here. Because the end result of normal milk toffee is a firm texture — ‘toffee’ is a misnomer here, but it’s what it’s called in Sri Lanka. It’s much closer to fudge, and a sort of airy fudge. The closest texture I know is maple candy (or if you’re familiar with New Orleans pecan pralines, they’re basically exactly the same as our cashew milk toffee, except they’re dropped with a spoon on parchment paper, rather than poured into a tray and cut into squares).

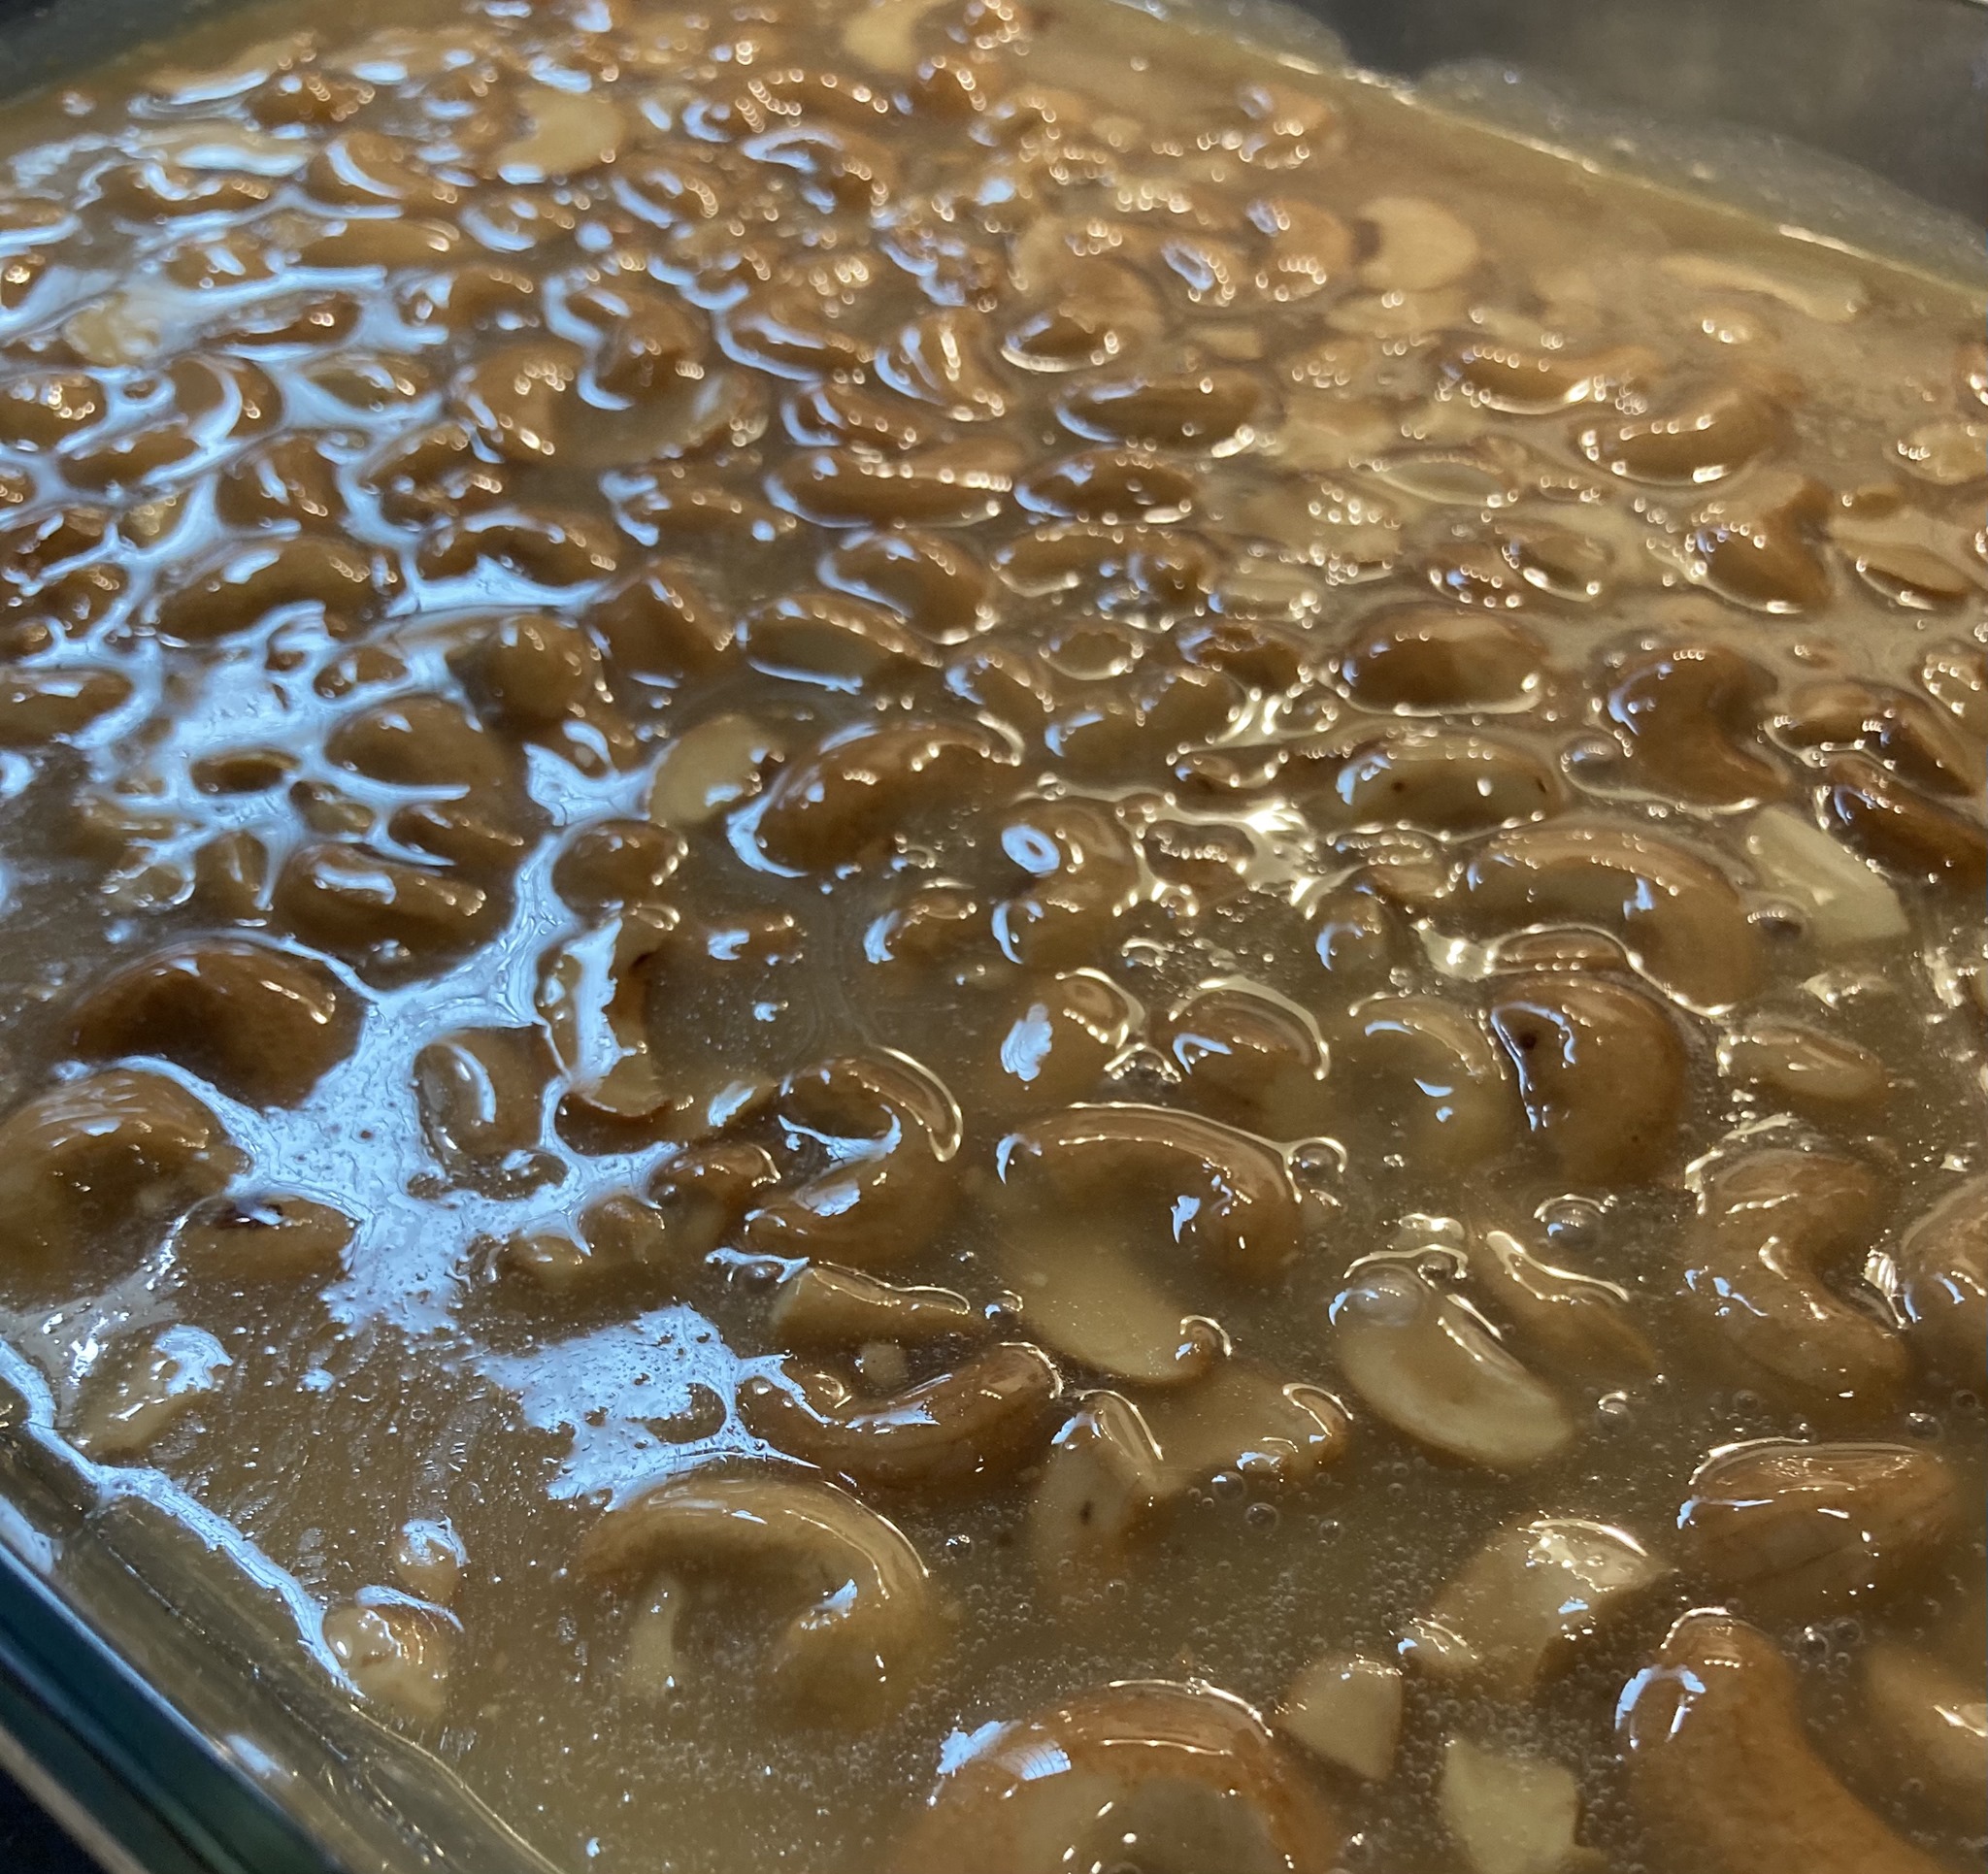
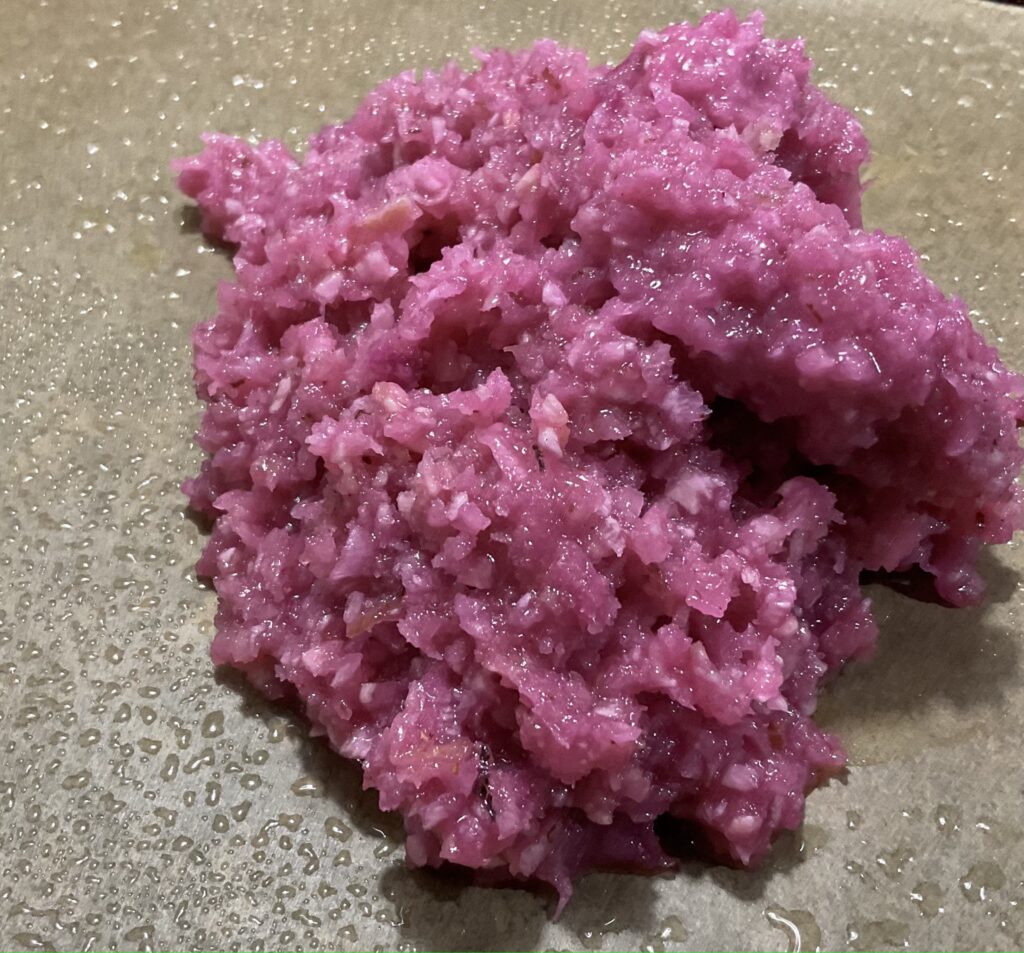
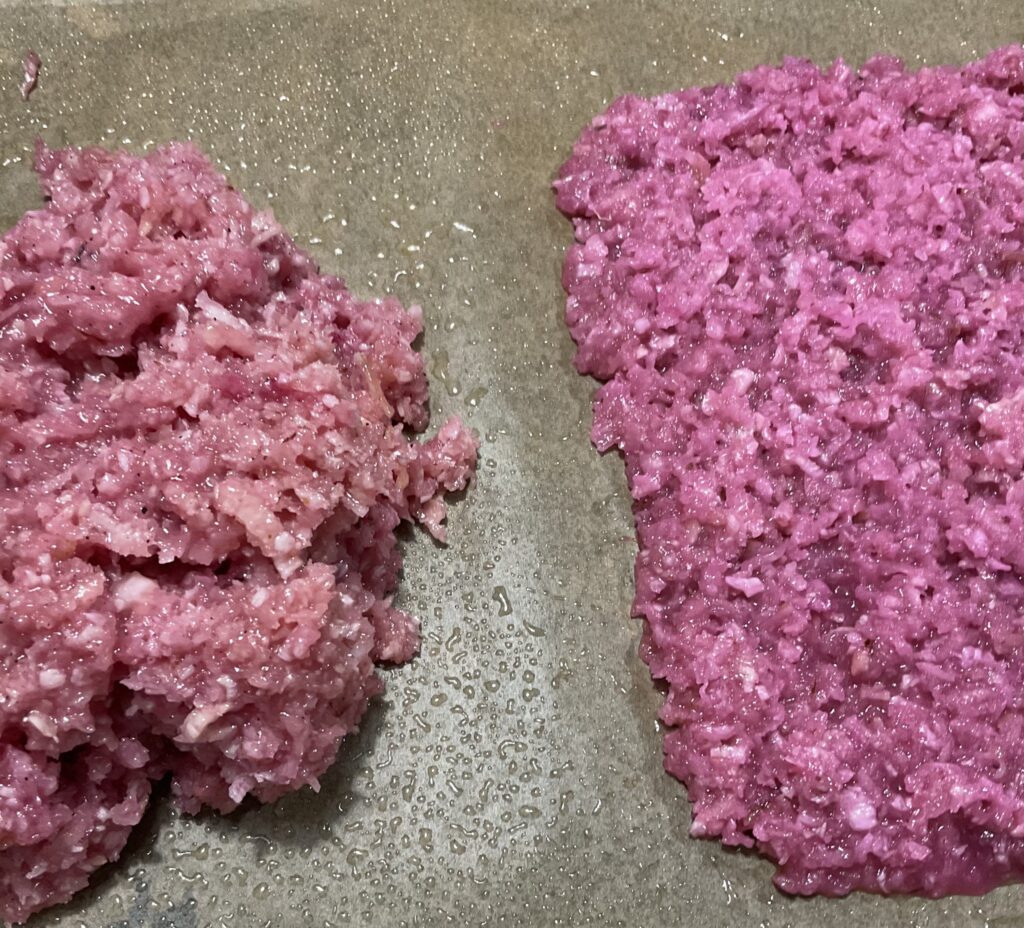
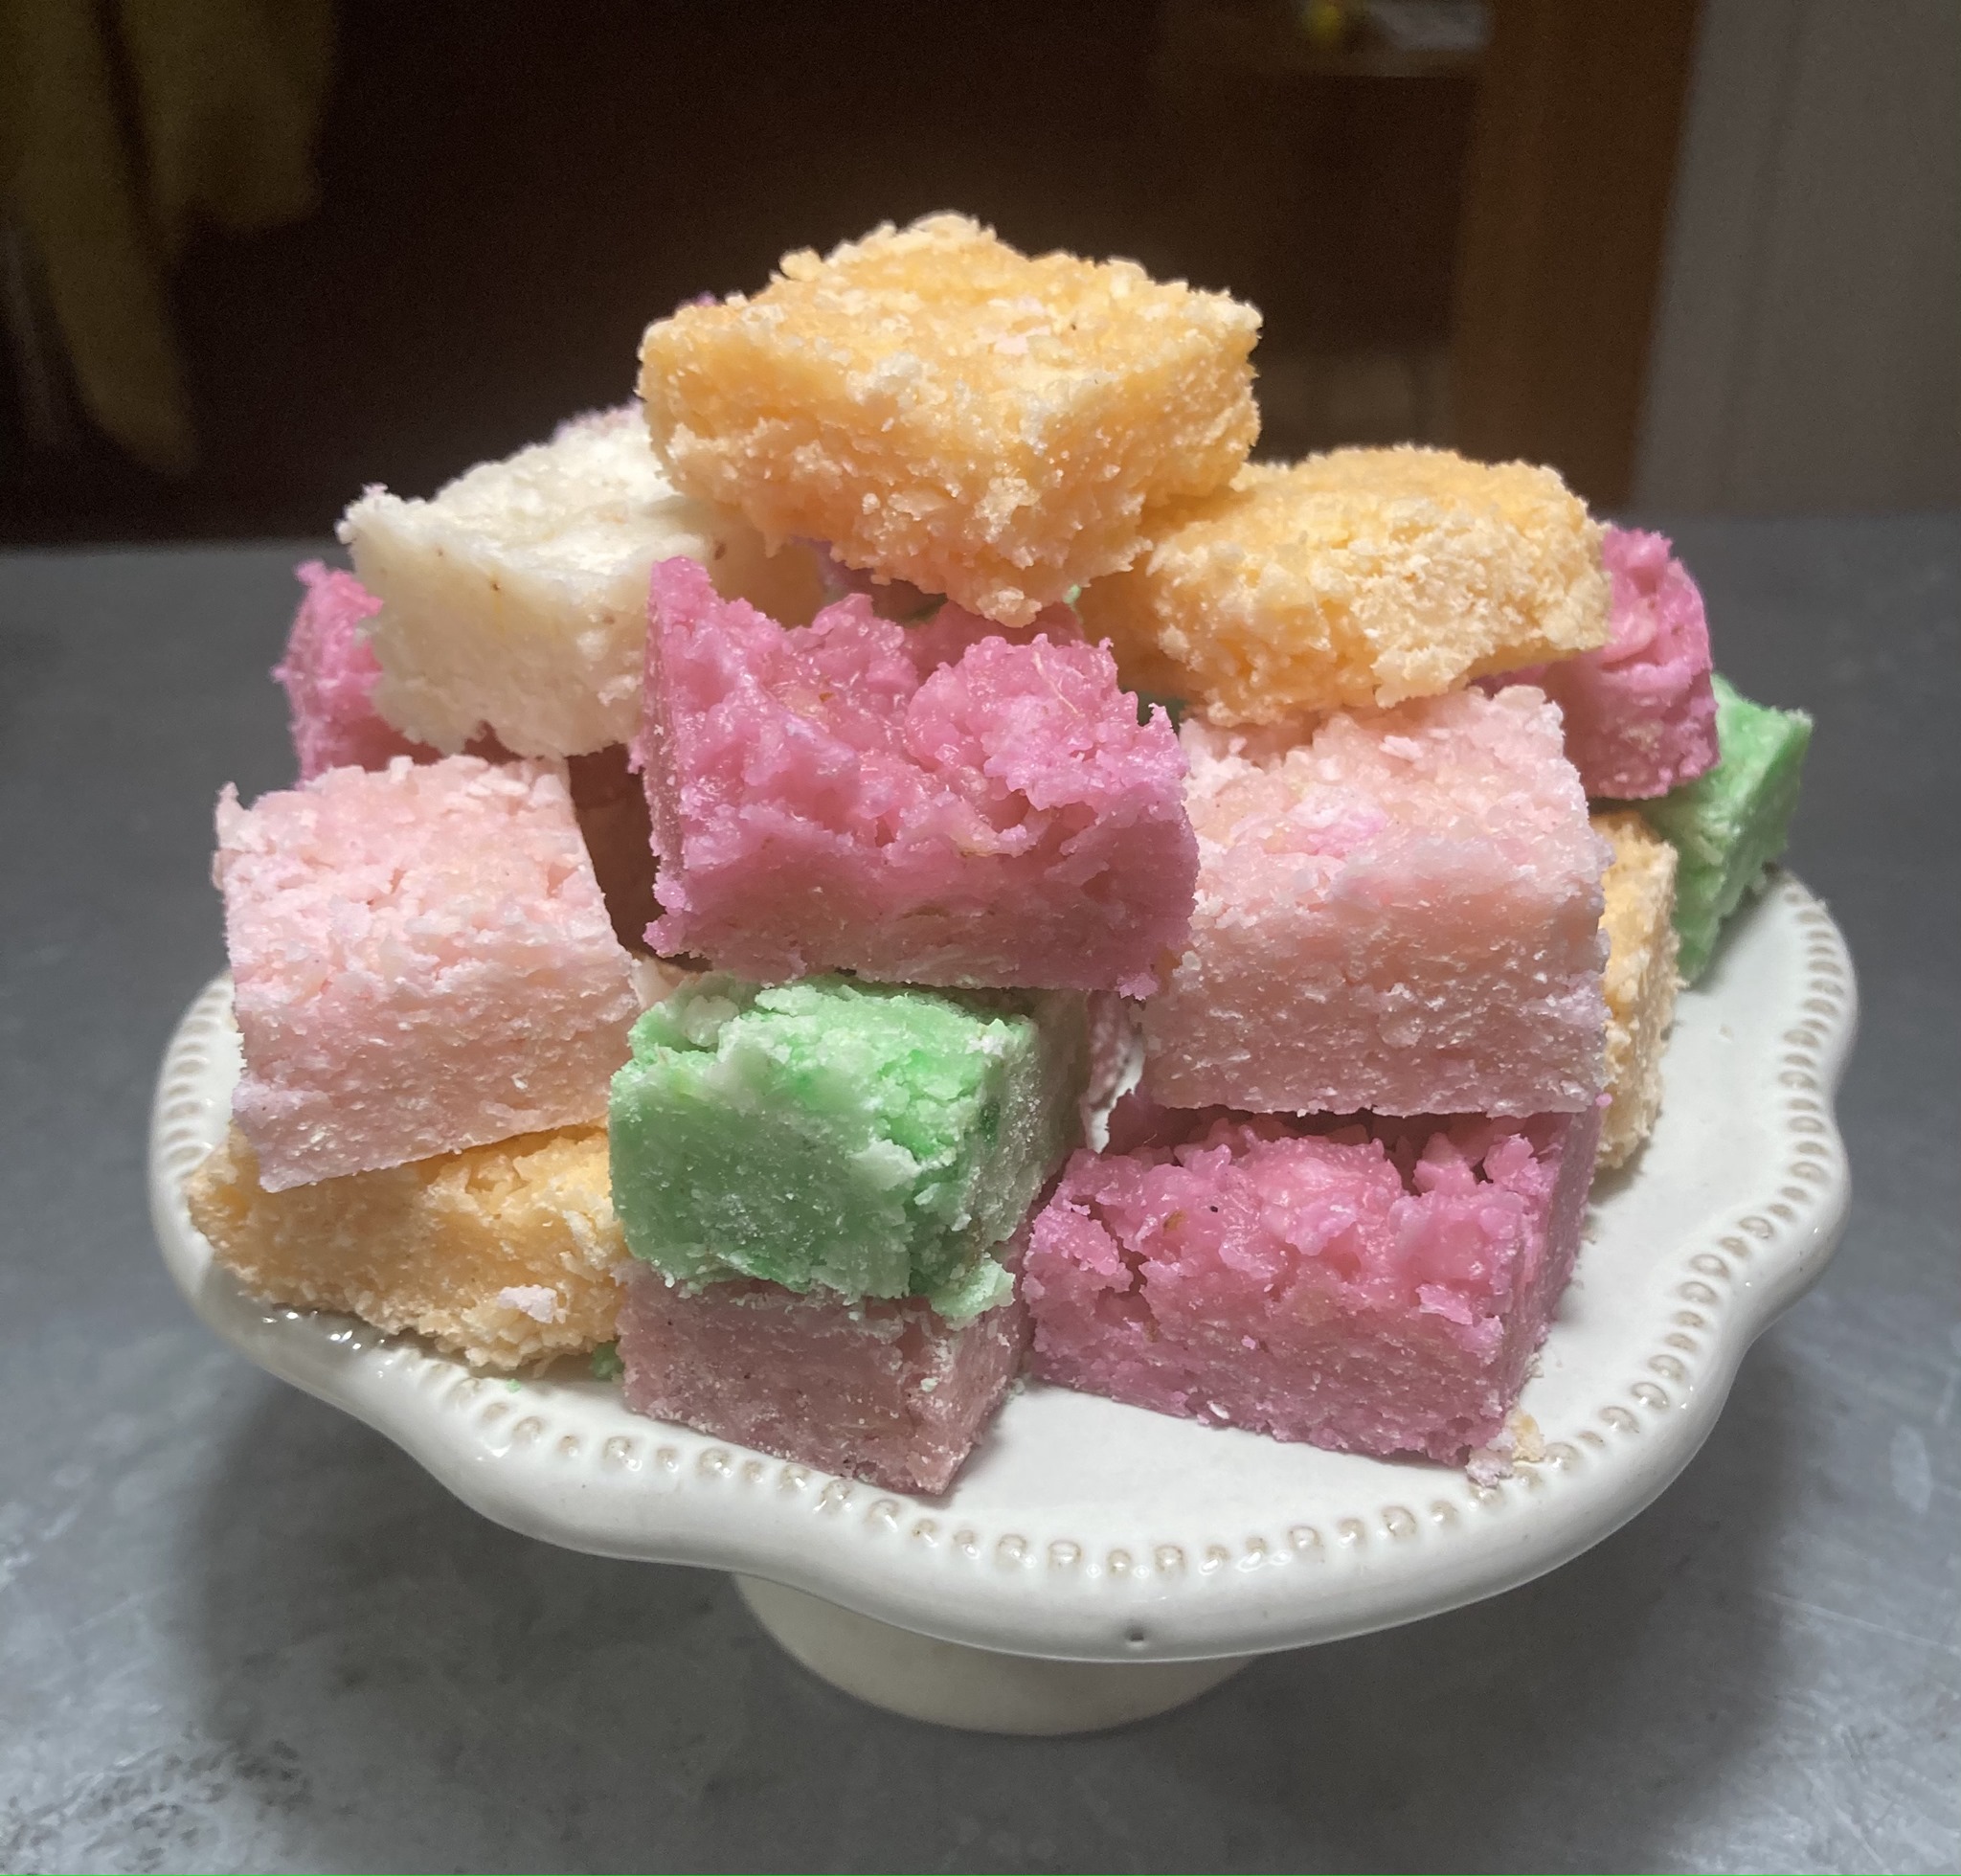
The end result of my second attempt, however, was not something you can cut. It’s actually more of a toffee or a caramel. I’m really not a candy-making expert — I know how to do a few things well, so I’d appreciate any food science people here who can help out. I’m guessing that the condensed coconut milk has more oil, perhaps, than the condensed milk, and that’s changed the consistency? I guess I have two questions:

a) what happened?

b) is there something I can do to adjust the recipe, so I can actually get milk toffee texture with vegan condensed coconut milk?

Help.

(Side note: It’s still delicious, you just have to eat it with a spoon. I’m thinking I spoon it into little sheets of cellophane and mold it into a caramel-like twist, and it’ll be fine for eating. Coconut-cashew caramels. But it’s not what I was going for.)

Sri Lankan Coconut Rock / Coconut Ice

(15 minutes + cooling / cutting time, makes about 30)

This is a classic treat in Sri Lanka for holiday parties, school and church fairs, birthdays, etc. The colors make it perfect for an Easter or spring table, and it’s popular with both children and adults.

The sweet seems to be more commonly referred to as coconut ice in the New Zealand / Australian Sri Lankan diaspora, and coconut rock elsewhere (though I haven’t done an exhaustive study!).

Some cooks make this with sweetened condensed milk, some with cow milk, some with dessicated coconut. My favorite version uses fresh coconut and rich coconut milk, for an end result that is both vegan and utterly delicious. }

*****

1 c. coconut milk
1 1/2 lbs. sugar
1 lb. freshly grated coconut (thawed from frozen is fine)

food coloring, if using

1. In a heavy medium saucepan, heat coconut milk and sugar on low, until sugar dissolves. Bring to a boil.

2. Add coconut and stir for another 5-7 minutes or so until the milk has mostly been reduced. (If you’re using a candy thermometer, about 250F, though this recipe doesn’t require precision).

3. If you’d like multiple colors, divide into bowls. Color as desired; usually we’d leave some white and color another batch pink or green, to create a bicolor effect, but single colors also work fine, especially if you’re going to make a few different batches.

4. Spread in a lightly oiled cookie sheet (or one layered with parchment paper), and flatten out using a lightly oiled spatula (or banana leaf, if you happen to have one on hand, and feel like going traditional). Layer additional layers immediately after, if using.

5. Allow to cool for a bit (at least 30 minutes), and then cut into squares or diamonds. If it seems sticky and hard to cut, let cool a little longer and try again; it shouldn’t be difficult.

NOTE: For natural food colorings, I’ve used and would recommend both dragonfruit powder and saffron.

NOTE: Coconut rock will keep nicely in the fridge for weeks, or may be frozen for several months if needed.

Coconut Rock Experiments

Coconut rock experiments — we’re getting close to the end here. As you can see, they kind of took over my kitchen for the afternoon, and there was coconut and sugar everywhere. I’m not complaining, though. I’ll note here that I ended up using green food coloring for the green, because although I tried pandan leaf powder, it lent very little color even after I’d put in quite a bit, and it just didn’t seem like a good option.

But you could, if you wanted to go all natural, and the second photo shows a stack that you could do with saffron on top, than pandan, then dragonfruit, which would be pretty fancy. I’d just expect a much paler green.

The pink & white diamonds are a classic shape.

Recipe in next post. It’s super easy. 🙂

Coconut Rock, Version #4

Coconut rock, version #4. Continuing with my efforts at natural colorings, I tried saffron here. Now, I think I should’ve added the saffron earlier in the process — if I had, I think I would’ve gotten more yellow color. I didn’t think of it until near the end, so the threads mostly didn’t add color. They did add some fragrance, but yes, starting earlier, recommended, and then I’m guessing the end result would be a pale yellow. I’m planning to try that again sometime soon, get it right.

This is also the vegan version where I tried coconut milk instead of cow milk, and reader, it’s better. Just more coconut flavor, tastier all around. I admit, it’s slightly more crumbly in texture, so if you’re looking for really sharp edges, you might want to stick to cow milk. But I think taste is king, and I think the slightly crumbly cut edge is plenty cute, so this is what I’d recommend. Recipe coming a few more posts down…

Coconut Rock, Version 3

Coconut rock, version 3. Some recipes claimed you could use sweetened condensed milk, instead of cooking down milk and sugar on the stovetop. So I tried it, and yes, that works okay, but the flavor was notably different (closer to a milk toffee flavor, less fresh). And it also took some real arm strength to stir the dessicated coconut into the sweetened condensed milk. So I know this is a favorite approach of many, but I wouldn’t recommend it unless you really like the flavor of sweetened condensed milk, and don’t mind some heavy-duty stirring.

This is the recipe I used to test out the bicolor approach, which is classic, and which I do like — spread out half of it while white, color the rest pink, spread that out on top. Eventually, you’ll cut these into squares or diamonds, and they’ll look very cute.

Coconut Rock, Version 2

Coconut rock, version 2 — fresh coconut, milk, sugar. I started using fresh coconut — or more accurately, frozen coconut, defrosted, because actual fresh coconut is not so easy to come across in Chicago, and if you do get it, it requires a lot of grating. But that said, frozen is very good, and is generally easily found in our local Indian grocery stores. This offered better coconut flavor, and I quite like the end result. But there’s a version I like even better, so we’ll wait for that for the recipe…

I also tried using dragonfruit powder to color it, and that worked great — pink / red food color often seems to give people headaches, so I try to avoid it when I can. It’s the lighter pink on the left in the last photo. (The brighter pink is perhaps more classically South Asian, though!)

Dragonfruit powder has a faint flavor that you probably won’t notice in this, but offers really nice color. It’s more expensive than food color, of course, so that may be a factor for you, but worth considering — a little dragonfruit powder goes a long way, so you can use one packet for several recipes, though be sure to squeeze the air out before resealing the package, or the powder will have a tendency to go clumpy, hard, and unusable.

Promised Y’all a Coconut Rock / Coconut Ice Recipe

I promised y’all a coconut rock / coconut ice recipe. I really should’ve posted it as I was cooking, but it was sort of a frenzy as I tried to keep four different variations straight, and blogging as I went was just beyond me that day. But I’m going to try to recreate it, sort of, here, using my photos as memory aids.

So in this first version, I used milk, sugar, dessicated coconut, and food coloring. This was a very common approach in the recipes I consulted, and it is just fine. But it is also my least favorite option, so I’m not going to bother writing out a recipe for it. 🙂. If you google ‘coconut rock’ or ‘coconut ice,’ you should find many write-ups of this.

Note: That pot was JUST barely large enough — I’d recommend using a larger pot. 🙂

Coconut Rock

I may have spent four hours today making coconut rock, a Sri Lankan candy. It doesn’t normally take four hours, but apparently, I have to try making five different versions because I am just that extra. Sigh.

Versions:
• desiccated coconut with milk, sugar, food coloring
• frozen coconut with milk, sugar, food coloring
• frozen coconut with milk, sugar, natural colorings (dragonfruit powder, pandan powder, saffron)
• desiccated coconut with condensed milk, icing sugar, food coloring

• vegan frozen coconut with coconut milk, sugar, food coloring

I now have a LOT of coconut rock on hand — anyone know if it freezes? If not, I may be reduced to asking people to stop by and pick some up off my porch…

Recipe(s) tomorrow, probably, including a vegan version.

Vegan Lime & Coconut Scones, with Lime Glaze

(40 minutes, makes 16 mini scones)

I used to be strictly a cream scones girl, but the problem is that I rarely have cream on hand when I have the urge to bake scones. These vegan scones use coconut oil instead, which is easy to store in the pantry — scone win! No one should have to wait for scones.

The kids loved these as much as Kevin and I did; all 16 mini scones were devoured within 48 hours. Boom!

For scones:
4 c. flour
2 T baking powder
2 T sugar
1/4 t. salt
1/2 t. citric acid (optional, to boost tang)
1 c. room temperature coconut oil (solid)
1 1/3 c. coconut milk
1/2 c. desiccated coconut (unsweetened)

juice of one lime (about 2 T) + zest of one lime

For glaze:
2 c. powdered sugar

juice of one lime (about 2 T) + zest of one lime + lime juice or water to make drizzle of your preferred consistency

1. Preheat oven to 425 F.

2. Whisk together flour, baking powder, sugar, salt, and citric acid, if using.

3. Chop coconut oil small and rub into the flour with your fingers until the flour looks pebbly.

4. Add coconut milk and gently combine with a silicone spatula or fork; do not overwork. Stir in lime juice and zest.

5. Refrigerate dough for 15-20 minutes for better rise.

6. If using a mold, spray with oil; alternately, spray oil or add a sheet of parchment paper to a baking sheet. Fill mold with dough, pressing gently to fill. Alternately, press dough into a circle and cut into wedges, or cut out circles. Places wedges or circles about 1″ apart on sheet. Sprinkle scones with jaggery or brown sugar.

7. Bake for 14-18 minutes, until scones begin to brown. Remove from oven and turn onto wire rack to cool.

8. If glazing (recommended), mix powdered sugar, glaze, and lime zest; drizzle over cooled scones and let set before serving.

Traditionally scones should be split and spread with butter, jam, clotted cream, curd, or whatever you like.

NOTE: Scones may be cooled and stored airtight at room temperature for several days; they can be frozen for longer storage.